Hello Everyone and Happy April!
Guess What...
Stampotique Originals and Lindy's Stamp Gang will be teaming up for a whole month of fun and inspirational projects starting today! (the 4th!)
(that's where My color inspiration for today came from)
Of Course, there will be delicious inspiration over at the Stampotique Designers Challenge HERE
Ok, So lets get on with what you came for...
Today, I am going to share how I made my master board for a TON of my projects for this month!
(6 pieces to be exact, The 1st one is pictured above... Also my project for this Word Up Weekend)
Warning: This is photo heavy so grab a cup of something yummy and get ready to dive it!
I love making master boards, they are so fun and always a great start for any project. I love that you can use them to try new techniques, or just de-stress.
(And, if you don't like any part... just cut it off!)
(Don't judge the scary looking process, I'm Messy but I love how my projects came out!)
Lindy's Products Used:
FLAT magicals - Caribbean Cruise
Magicals Shaker- Black Forest Black
Magicals- Sidewalk Chalk
Embossing Powder- Dandelion Yellow Green
Flat Fabio-Raspberry Lemonade (Spray)
Starburst Spray- Blue Hawaiian Blue
Starburst Spray- Rusty Lantern Lime
Stampotique Stamps:
Journey Collage
Texture Cube 1
Barcode Text
Kassa's Bloom
Script Background
To start I began with a 9x12 piece of watercolor paper.
This is a home made stencil from one of my dies...
(Note paper stencils are not the best with wet mediums... but this was an experiment so you get to see it all... Below are the magicals mixed with clear Gesso)
(I know scary right? Don't worry the process is scary but the final pieces come out perfect!)
Here are the 3 sprays I used on this. There are a few layers of spraying and drying with my heat tool
(Note I only use the blue to "finish off" the final card you see above...
Here you can see some of the awesome orange magicals...
look at all those colors in just one powder!
Close up of some of the "hidden texture/text" I added with embossing powder...
It shines so beautiful in the light in real life! So hard to capture.. very pearlized and iridescent!
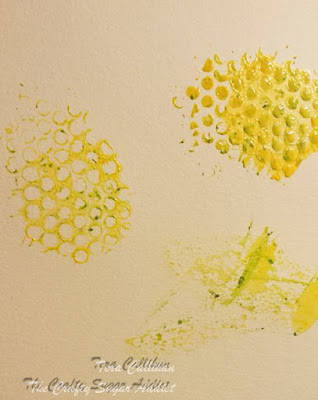
Here you can see where I added some clear glossy gel medium
(look how the colors activated around the edges... so fun!)
More sprays and flat Magicals added to give dimension and help the numbers "pop"
(You can also see the journey collage stamp I stamped to add extra visual interest)
More Detail of everything together....
(SO... at this point I forgot to take a picture of the full piece before I cut it up... but below you will see all the fun bases I made from this one piece... Some may still look scary and unfinished.. but remember these are bases.. they will transform into beautiful finished pieces)
Below are the master board pieces I cut into 1 tag, 2 ATC's and 3 cards
(the one I used for the example card not pictured...Yep not sure how I screwed up and missed it?)
I hope this helps you to feel brave and compelled to do some experimenting of your own!
Be sure to check back throughout the month to see what these other 5 bases have become!


I have not been brave enough to tackle a master board but I always love the many I see. Your pieces look awesome. Once it's cut up, I imagine you might find gems of sections of the board you might not have noticed while it was all one piece.
ReplyDeleteThis comment has been removed by the author.
ReplyDeleteMaster boards are awesome starters and I love yours. I think they're a great way to (ahem!) kick The Muse in the ass when she isn't cooperating. Looking forward to seeing how these transfrom, Tera.
ReplyDelete