Free background from VintageMadeForYou
Showing posts with label distress. Show all posts

Wednesday, December 29, 2021

Mini Memory Tin


 Hello crafty friends!

 It's me Tera, here to share one last piece of inspiration before the new year.

I have been loving the mini tins and journals by " Suzy ShabbySoul", she has some great tutorials on Youtube one of them can be found HERE, I also took some step by step photos below. 

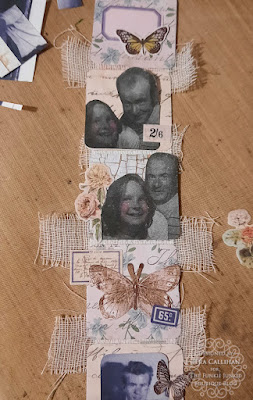
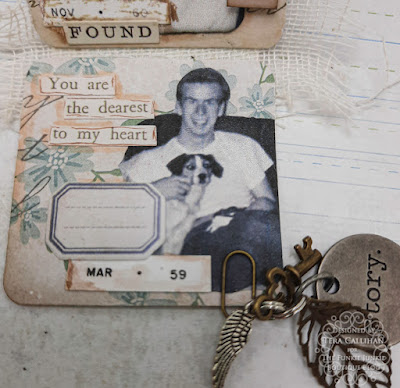
My little mini journal was a gift for my mom. It features photos of her and her dad. He passed away when she was young so I thought this would make a good memory keepsake. 
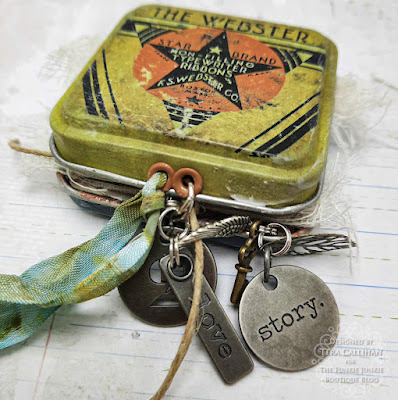
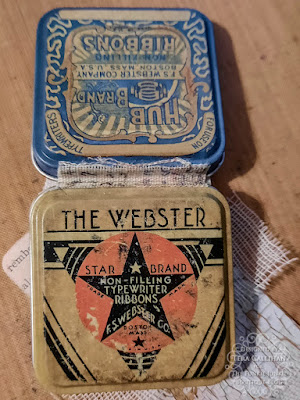
The outside of the tin I added eyelets to for the ribbon, as well as an extra for charms

(Ok, yes...Originally I just punched the hole in the wrong spot...haha. However, it worked out perfectly for the charms!)
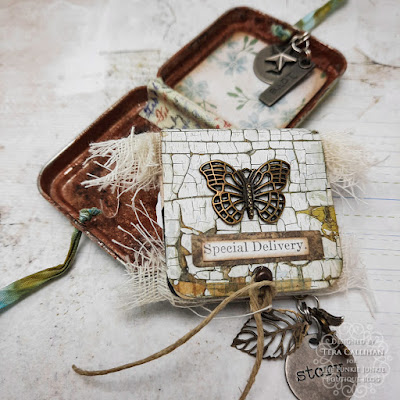
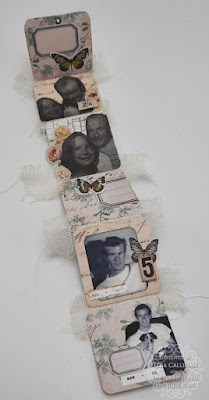
I chose to make the tiny journal so that it could come out to be easily looked at. The charms attached to the journal are hanging from one of the Tim Holtz tiny paper clips. (I thought it could be a fun decorative piece as well as a pull tab).
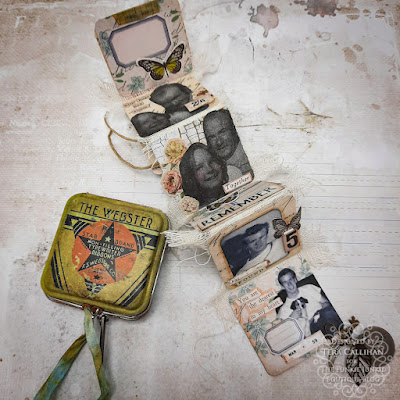
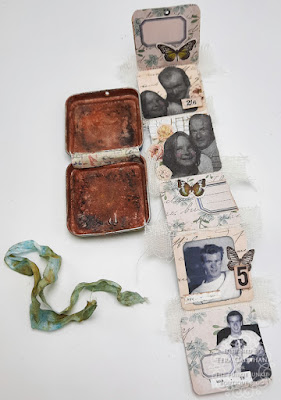
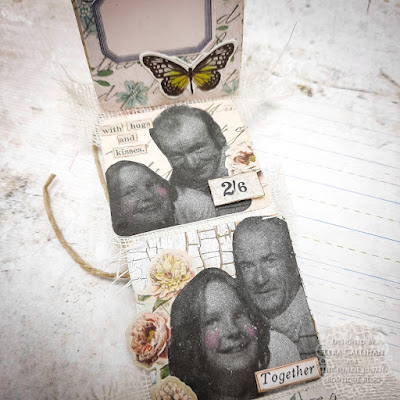
Here you can see the full layout with it opened.


Ok, on to the details...

This project is a little photo heavy, so you may want to grab a drink before you dig in. 


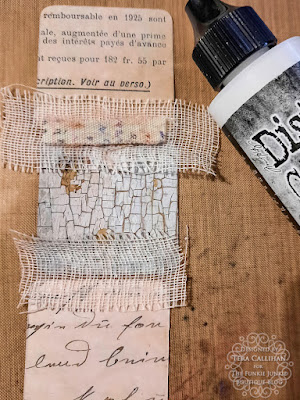
I started by cutting my chosen papers to 1.75in x1.75in. I then rounded the corners with my corner punch. After I laid out my 6 papers, I then flipped them over to start gluing them together. I put a little collage medium down, then used strips of mummy cloth to bind everything. (leaving about 1/8in between each piece) I added a little more collage medium over the tops of the mummy cloth to really make sure it would stay and be sealed. 


I also decided to add some fabric tape over the mummy cloth for extra strength and visual interest.


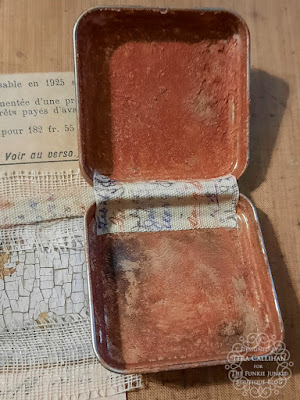
For the tin I used clear gesso, translucent grit paste, and distress crayons to get a rusty look. (rusty hinge, walnut stain, and black soot by the time it was all done).

I also used fabric tape as the hinge on here too. (I did glue it down with collage medium and set aside to dry)


As you can see I added the tape to both sides :) 


Now that the fabric binding was dry I went back to playing with the mini journal strip.
(the blue flowers remind me of forget me nots, so that's why I picked that one)

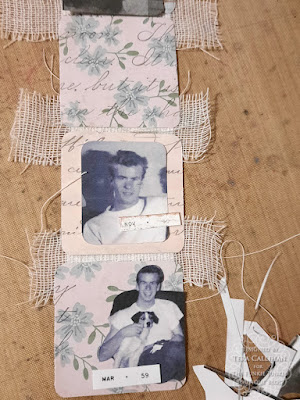
I copied and printed the photos since my mom have very few photos of her dad. This kept me from feeling guilty about cutting them up. 


You can see I started by laying out all of my main elements before gluing everything down. 
(I even changed my mind completely on the one square). 


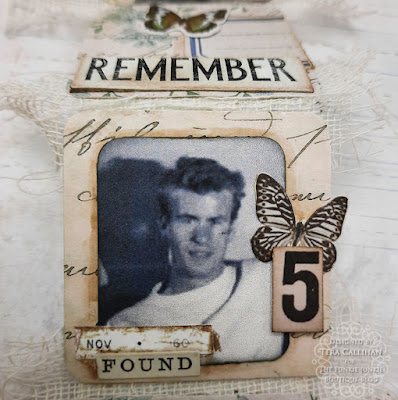
Once I had everything how I liked it, I glued things down and added pop dots under the 2/6 and the 5.


I also added more crayon to the tin. 


To truly finish everything I added some Tim Holtz stickers and a quote chip I peeled thinner.


 I used my water brush with vintage photo distress ink to lightly shade around the quotes, and some of the pictures. 


(you can kind of see that the 2/6 is elevated here)


I of course also added the charms, eyelets and ribbons. 


I did end up making a wrap around cover with a brad to tie the cord around. This helped to give it that mini book feel for me. 


Thank you for visiting! I hope you all like my mini memory tin!!

Supplies Used:

Tim Holtz tin tops (there are also some cute Christmas ones out right now too!)
Tim Holtz Idea-ology sticker book (older one)
Tim Holtz Quote Chips
Tim Holtz water brush (These ones don't leak! I love them!!!)
Distress crayons: Rusty Hinge, Black soot, Walnut Stain
Distress Stains- Antique linen and speckled egg (for the ribbon)
Eyelets
Random charms I had find other charms HERE

Saturday, September 25, 2021

6 simple cards with only 1 stamp set


 Hello Crafty Friends!

Today is my Saturday showcase day for The Funkie and Frilly challenge blog.

Today I wanted to share a fun challenge I gave myself. I challenged myself to use only 1 stamp set to create 6 simple cards that can be good for any occasion.  I chose to use the Tim Holtz Set - CMS385 "Into the woods".  I wanted a woodsy look that could be good for fall, Christmas, or masculine cards. 


3 of the cards are A2, one just a bit shorter than A2, a slimline card, and one that's about 2/3s the size of an A2 (made from the scrap from cutting the slimline card).


A simple frame card
 (you could easily switch out any of the animals to the bear or the fox from the set).


Simple and woodsy.


Woodsy with a splash of color.


A touch of plaid for simple color.


A simple and easy wreath card. 
(This could also be a bird nest. I should have done a touch less stenciling for my preferred look).

My favorite of all the cards, and yet the simplest!


What do you think of these cards?

This stamp set could easily make so many more simple cards, or awesome elaborate ones!!


Products Used: 

Stamp set- Tim Holtz Into the woods

Inks:

    Distress oxides- vintage photo, frayed burlap, walnut stain, forest moss, crackling campfire, candied apple, and black soot

    Original Distress inks- scattered straw, walnut stain

    Other inks- Delicata golden glitz, Embossing ink

Embossing powders- black and red

Tim Holtz layering stencil - THS021 Speckles

Tim Holtz small talk stickers

plaid scrapbook paper

blending tool

Wednesday, August 25, 2021

De-stressing with distressing

 Hello Again Crafty Friends!!!

It's that time again!!! Today starts the new challenge with the Funkie Junkie Boutique and I'm the Host!

Join us over on the Frilly and Funkie challenge blog HERE.

The new challenge is called "De-stressing with distressing"

The object is share a project with your favorite ways of distressing.


 My project was inspired by Stacy Hutchinson. you can see her project HERE.


I started with a smaller vignette box and a piece of paper from the Tim Holtz backdrops. I cute my paper to be able to cover all of the outer sides. ( I am still considering doing a 2nd project on the inside at a later date.) 


I cut my port hole and bits using the Sizzix Bigz die "Steampunk Parts". I used a combination of the old Distress powders, Distress stains, grit paste, and Distress crayons to get the rusty look. For the red part I used "rouge" Zing embossing powder.


(Close up for detail)


You can see I flicked off a lot of the red embossing powder before heating for a more weathered look. then the stains and crayons filled in the gaps. The image is one of the Tim Holtz "found relatives". 


Since I loved how Stacy stitched around her pieces, I chose to do the same before gluing anything to my vignette box. 


After all of my paper pieces were glued on using Distress collage medium, I then added my crackle pastes, and decorative elements such as the "be brave". When everything was dry I used Distress inks, stains, and crayons to add a bit of grunge.


I also added a heat embossed fish to the front with white embossing powder and the stamp set "Sealife" by Tim Holtz. The string bits were extra left over bits from stitching the panels, and I liked the look of them so I also added them. 


(Here's some of the side details)


(The other side...
I chose to keep both simple since I may add to the inside still and if so not sure if I may choose to carry whatever onto the outer sides.)


Well, I hope you like this little display piece, and don't forget to check out the AMAZING piece I was inspired by HERE. 

(Really, you should make sure you follow Stacy Hutchinson if you don't already! Her work is outstanding!!)


Products Used: 

Tim Holtz Backdrops Papers 

Collage Medium 

Opaque crackle paste 

Grit Paste 

Palette Knife 

Found Relatives (the new sets may not have this fella. Mine was from an old set) 

Quote Chips 

Paper Distresser 

Distress Crayons Set #3  

Walnut Spray Stain  

Vintage Photo Spray Stain 

Picket fence Spray stain (for splatters) 

Inks: Walnut stain, Vintage Photo 

Red Embossing powder 

Heat Tool 

Stamp Set CMS 304 "SeaLife" 

Steampunk Parts Bigz Die 


Wednesday, August 11, 2021

Best Day Ever

 Hello Again Crafty Friends!!!

It's that time again!!! Today starts the new challenge with the Funkie Junkie Boutique.

Join us over on the frilly and funkie challenge blog HERE.

The new challenge is called "HOT HOT HOT"... 

some places are getting up to those triple digits, and we want you to work in 3's. 

(use 3 of an item, 3 colors, etc.)


For my card, I used 3 layers, 3 flowers, and 3 of each type of leaf. 

I started by cutting out all of my flower and leaf pieces from some of my Tim Holtz Kraft core cardstock. I then lightly sanded all of the pieces to expose some of the core for a more distressed look.

I used distress collage medium to glue everything together then used various distress inks and oxides to add extra color. (I did add walnut stain distress ink to all of the edges before assembling) 


The background paper I added was also from the Tim Holtz backdrops. I used walnut stain distress ink around the edges then added some white stitching.


(detail of the flower layers)


I used kraft heavy cardstock for my card base, and the Tim Holtz black kraft core paper for my 2nd layer. (lightly sanded of course)


Next, I added some crackle paste in 3 different areas.


Once, it dried I used the walnut stain distress crayon to add detail and grunge to all the cracks, as well as along the stitching.


To finish the card off I added the "Best Day Ever" quote sticker over a scrap of gold, then mounted with pop dots.


Thank you for visiting! 
I hope you enjoyed this card.

Products Used:
Kraft stock Neutral (I used the old textured ones, but this is similar colors)
Kraft stock cool (also similar colors.. you could also use ink on watercolor)
Distress Crayons Set #3 (I used walnut stain from this)
Hickory Smoke spray stain (for splatters)
Picket fence Spray stain (for splatters)
Gelly Roll (white gel pen #10)
Tim Holtz detail water brush 


Wednesday, June 30, 2021

Memory's of a time gone by

 Hello Again Crafty Friends!

It's that time again! Time for a new Funkie Junkie Boutique Challenge

The theme is all about "Time" for this one

Check out the challenge details HERE if you want to play along. 


I chose to create a vignette box of captured memories for my piece. 

Here you can see how the distressing began with a lot of alcohol ink, grit paste, crackle paste, and distress crayons!

Close up so you can see how I used mushroom alcohol ink on the pocket watch, pen nib, and chip quote. You can also see the grit and crackle paste I used. I used mustard seed paint on the star, and collage medium to glue it to that milk tab. 

Close up of the 3 D embossed pieces I added to the inside. I used black soot paint for the distressing on these. This was the crackle before I added the crayon. 
***
(I did use collage medium over the crackle after it dried, because it did not want to stick to the wood)

I blended with a paintbrush and a little water after scribbling on the top of the crackle