Free background from VintageMadeForYou
Showing posts with label Monthly Challenge. Show all posts

Wednesday, October 20, 2021

Grunge and Ghouls Haunted House

 Hello Again Crafty Friends!!

I am super excited to share todays post with you. This is my inspiration for the new Funkie Junkie Boutique challenge "Grunge, Ghouls, or Giggles". 

I am so excited to share this little haunted house box. I have been having so much fun with the new Tim Holtz village dies. Years ago, I has the original dwelling die, and one of the add-ons. Ironically I had been playing with the old ones a few weeks before the new release! I had been looking for some of the older retired ones, so I'm thrilled to have them now as thinlits!!! Be prepared for a photo heavy post.  


I started by cutting out all of the pieces I thought I would use from heavy weight cardstock.


I used the brick mini 3D embossing folder to emboss the base pieces, then distressed with picket fence distress ink. 


I put all of the base together, then I added vellum behind the windows. 
(Yes I forgot to put it in the roof one before gluing the roof on. I should have glued them all in before gluing things together).


Using a craft blade I cut out some bricks, then glued in some wood strips. 
(I also snuck in the upper window with some long tweezers...haha that was a struggle!)


Next, I used the halloween "crypt" grit paste on the roofs. 
You can see it wet, where I started to place it on the house. (It drys clear with a sort of sandy color 


After the grit paste dried, I added on my roof tiles, doors, window frames, and roof spikes.
(I used a silver ink on the roof tiles and spikes. Then I used a gold distress crayon on all the window frames)

Side view

Back view

Other side

The base box was first painted with hickory smoke distress paint, then messily layered with a thick layer of crackle texture paste.


When dried and cracked I used the walnut stain distress crayon to highlight all the cracks.
To finish everything off I added twisted citron paint with a dry brush. I used the new holiday icicle crackle paste to all of the windows. The 2 labels were distressed with brushed corduroy distress ink. (they were from the Halloween ephemera pack). The pumpkins were added from the skulls and pumpkins Halloween pack. The skull and crossbones was an old one i had from my stash. 


I used the vault series dies for the ghosts, and some of the bats. 
The tree was from a die cut my friend sent me. 


I added the purple tiny lights, to give that perfect haunted creepiness.


Detail shots


More close ups


More details


Details again


Supplies Used:

IO fence die
Distress paint- twisted citron and hickory smoke
Distress ink- Brushed corduroy 
Silver ink
Distress crayons- Gold and walnut stain
Hot Glue
Crackle accents (could be used for the windows)

Wednesday, October 6, 2021

Simply Grateful

 Hello Crafty Friends

Are you ready for a new challenge?

 Today starts the new challenge on the Frilly and Funkie blog. The challenge theme is "Fall Gratitude".

I went with a simple fall gratitude card. 


Supplies Used:

Tim Holtz small talk sticker "occasions"

3D embossing folder-  Tim Holtz Foliage

Tim Holtz Thinlits- Funky Nature 665215

Mummy Cloth

Distress Oxide inks-Vintage Photo, Forest Moss

(random others used on the flowers, but these came from my extra cuts stash). 


Wednesday, September 8, 2021

Die-na-mite Halloween card

  Hello Again Crafty Friends!!!

It's that time again!!! Today starts the new challenge with the Funkie Junkie Boutique and I'm the Host!

Join us over on the Frilly and Funkie challenge blog HERE.

The Theme is "Die-na-mite" 

Dies can make a simple or boring project extra mighty... I want you to use your dies to make a project! They can be your main focus, or work in the background to make your project a little extra mighty.  

For my project, I chose to make a Halloween card. This year I am going to try really hard to get a few out to some family and a few special mail art friends I have been super neglecting for a while. 


To start I cut out the small pumpkin from the new Tim Holtz- "Pumpkin Patch, Colorize" die set. I added some of the new mica sprays to my black layer, and my top orange layer. I also lightly inked with vintage photo distress ink on the edges of each piece. To glue everything together I used collage medium (my go to matte glue).


Next, I went through my background box, and found a leafy background I had created using various distress inks and oxides with a Dylusions stencil (and water flicks of course).  I also had this wood frame sitting on my desk from another Idea that hadn't worked out like I wanted. I thought it looked so perfect with the leaves so I decided to add it (It was created using a 3D wood grain embossing folder on brown cardstock, then using a rectangle nesting die to cut out the center to create a frame). 


From here, I got in the groove, and totally forgot to take progress photos, but I stamped the "wishing you a spooky Halloween" from the "Monstrous" stamp set by Tim Holtz in black soot- Archival ink (since I am stamping over oxides I used my stamping tool to stamp it several times so that the color would really pop).


I also used white heat embossing with a spider web stamp from the "Tangled Webs" stamp set by Tim Holtz. 

The tiny bats I added were from the die set "Vault series: Halloween 2021" (Yes the pumpkin patch set comes with bats, but for whatever reason I liked these tiny bats better. lol).


To add to the look of the frame I added the screw heads to the corners of the frame. I thought this gave a little extra something to the look. I also added grit paste to the screws and the area around them for a worn texture (I used the new Halloween grit paste, but since I ended up covering it up any of the translucent grit paste would have worked). 

Once that was dry, I used distress crayons to make the wood grain pop more, and to add a bit of rusty/grunginess around the screws.  


Last to finish off the pumpkins, I used a white gel pen to add random highlights to the pumpkin so that it would really pop off of the card (which was adhered with pop-dots to give it dimension).

Products Used:

Dies: Pumpkin Patch, Vault series: Halloween 2021, Rectangle nesting die (I used an old retired set, but any would work).

Grit Paste (I used Tombstone, but THIS will work too)

Tim Holtz 3D wood grain embossing folder

Stamps: Tangled Webs, Monstrous

Inks: Distress inks, Distress Oxides, Black Soot Archival, Embossing ink pad

Prima Junk Yard Findings (these are old so not sure if they still make them) You can also use Hardware Heads by Tim Holtz (my usual go to)

White Embossing powder

Distress Crayons (sets 7 & 10 are perfect for rust, and #3 is of course needed for the white highlights)

Tim Holtz Halloween Mica Sprays -Set 1

Collage Medium

Dylusions Stencil - Leaves 

Wednesday, July 14, 2021

Things with wings


 Hello Again Crafty Friends!

It's that time again! Time for a new Funkie Junkie Boutique Challenge

The theme is all about "Frilly Things" for this one

Check out the challenge details HERE if you want to play along.

I created a cute little matchbox using the older retired version of Tim's matchbox die. He said the New one is the same size if you are wanting to recreate this.

I used the pale pink Kraft paper from Tim Holtz pack of neutrals... I know it doesn't photograph as pink, but it looks pink to me in real life.

I added the lace die cut from Tim Holtz crochet die set.  If you've been by my blog recently, then you know I had to use more wings and a Pen Nib. I also, added one of the retired Tim Holtz Hitch Fasteners ad a drawer pull.


Products Used:
Collage Medium (my go to glue along with glossy accents)
Tim Holtz Crochet die
Ideology pen nib (they no longer sell the one I used, but this has one)
Kraft Core Paper (the pink is in the neutrals)


Wednesday, May 6, 2020

You've made the cut... CAS card

Hello Crafty Friends!

Today is week 2 of the CAS challenge over at Stampotique Originals... I normally find CAS challenging, but lately I have been loving it.


Join us on the Stampotique facebook page or on the blog!

Stamps Used:


I hope this card brings you a smile.
Stay safe and well!


Wednesday, April 15, 2020

Tag, You're it...

Hello Crafty friends!


What day is it? Wednesday! (I know hard to keep track!)
Wait, you know what that means? 
NEW CHALLENGE TIME over at Stampotique!!!

This weeks theme: Tags galore -SDC346

Stamps Used:

I love creating on tags! They can be used on gifts, or added to card fronts, art journals, and so much more! Plus, they are a fun easy way to test out ideas on smaller formats.


I hope you will create a tag and join us! You know you can win a 25$ gift card to spend at stampotique? You can join on the Facebook page OR on the blog!!! 

You may also have your art displayed on the Facebook banner!

Wednesday, February 12, 2020

Pure Heart

Hello Crafty Friends! 

Today I want to share something fun that I was inspired to make for the
Funkie Junkie Boutique Challenge. 


The theme is "Love is all around us"
You can join or read more HERE


I wanted to create something non-traditional and vintage. 
I knew right away that I wanted to used this heart ad by Tim Holtz.
(It's from the stamps set- ECLECTIC ADVERTS - CMS372)


I stamped it in black memento ink, and colored it with a red alcohol ink marker.


I distressed the focal image with distress ink in gathered twigs, and ground espresso. 


Here you can see the mica glued on the main image using distress collage medium. I also punched the 4 corners and added Tim Holtz hex fasteners.

For the base layer I used Tim Holtz correspondence paper pad. Which I also distressed using the same 2 distress inks. I also added some cord I had on hand. 

I also used layers of Tim Holtz kraft-stock for the bases.

Here it is all finished!
I hope you all enjoy it!

Wednesday, September 4, 2019

Flower Power

Hello Crafty Friends!

Today starts week 1 of a new Stampotique challenge "Flower Power". 

For this challenge you can take it however you choose, you can do something flower based, or based of the flower power era.

Naturally, I chose to create one of my favorite things:
That's right... Mail Art!

Stamps Used:
Dirtball witch
Flos
Salutations 2


In addition to using the stamps listed above, I also used distress ink, memento ink in rose bud, various markers,  and a layering stencil.

I hope you enjoy it too!


Wednesday, March 20, 2019

Heavy metal love

Hello crafty friends!

It's Wednesday,  and you know what that means... inspiration for the weekly Stampotique Originals challenge 

If you haven't guessed by today's blog title... the theme is
Heavy Metal

This is actually week 2 of the challenge, so be sure to hop over to the stampotique blog and check out last week's inspiration too!

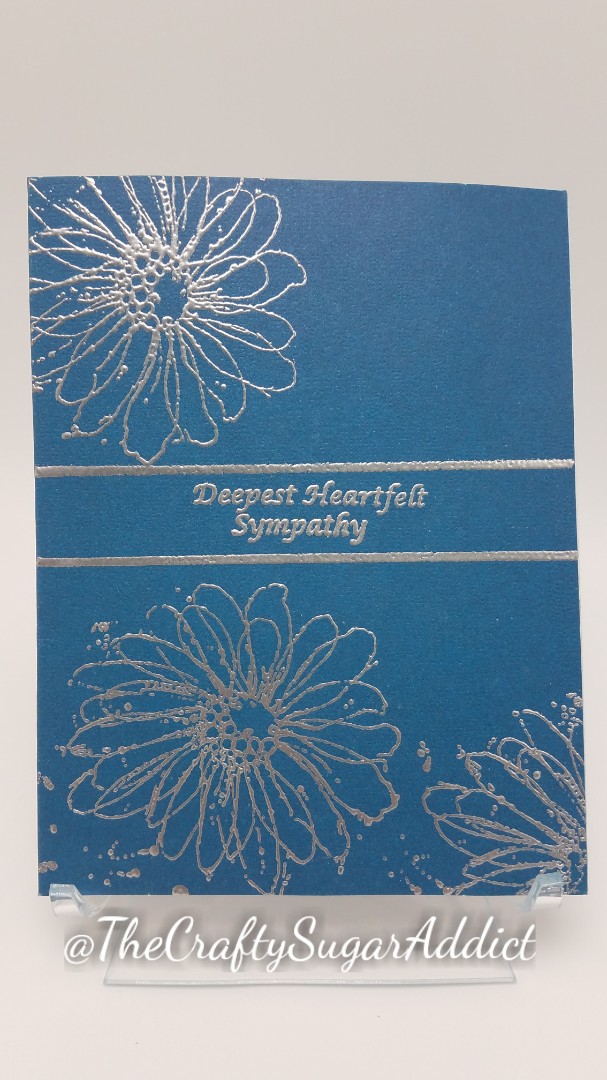
I actually ended up making two pieces for this challenge.  The first piece I made was a super grungy fun steampunkish card; and for the second one I did a clean and simple style sympathy card with metal heat embossing. 

(Stamps linked below each card)


(Close up for details)


(Close up for details)

Thank you for visiting.
I hope you are inspired and join us in the challenge! Don't forget there's a chance for a $30 gift card.

Wednesday, February 27, 2019

Fragile Creatures

Hello crafty friends!

Today's my Wednesday to share a little inspiration for the new 
Stampotique Originals designers challenge
The theme is "Birds and bees"


I decided to create two different cards that both Incorporated birds and bees.

STAMPS USES: 


I hope you enjoy this take on the challenge, you can see my process below. I did end up changing final colors for my main character by stamping her again  and hand cutting her out... for the white based card I basically follow the same technique without coloring the background.

I started by stamping out of the bees oh, then masking them off. Next I stamped my border Oodles of doodles. Then my main image was stamped.

As you can see above I have my main image and the bees masked off so that I can apply background color on top of everything else. I used various distress inks and oxides for this.

Here you can see where I have a little more color layed down with the masks still in place.

This is the view when I removed the masks.

This was after I finished all of my coloring , but I decided it was too monochromatic. I wanted more variation, so I stamped her out again. (as you can see in the pictures above.)
 I hope you've enjoyed this little card project.