Free background from VintageMadeForYou
Showing posts with label Shabby Chic. Show all posts

Wednesday, April 1, 2020

No Fooling, New release time!

Hello Again Crafty Friends!


Happy April 1st! 
I hope you are all safe and well during these crazy time!
I am staying safe and crafty here in Ohio. 

Ok, Are you guys as excited as I am about new releases?
This month has so many awesome samples! You will definitely want to stop by the Stampotique Originals facebook page! The team has really been blowing me away with these samples. 

Check out all the new stamps HERE.

Let's start with two super sweet stamps from Kassa. 
(I love how this card and envelope came out...I think these 2 are heading to my niece).


Next I will share my samples with Daniel's 3 awesome new releases!!! 
Yes, 3!

Ok, let's start with an art journal page using the new Gristen.
I love how this came out... She is so fun!
(I added the wings to her)


Now, time for a fun and simple birthday card using the new cake "Oncewholenomore".
I love the name of this one. lol


Ok, now my absolute favorite of this release ... Falstaff ... he is SO CUTE!
(These are all mail art envelopes of course)


Ok, What did you all think??? 
Love right!?!

Ok, well, back to crafty play and cleaning for me. 
Stay safe and crafty!


Saturday, February 14, 2015

Send Some Love

 Happy Valentines Day to all my crafty friends!!!

Today in the spirit of love I thought I would create one of my favorite things... 
Mail Art!!!!


Today's Envelope features 2 rubber stamps from the fabulous 100 Proof Press.
You can find the 2 stamps Here and Here

Other Supplies:
Scrapbook paper to crate the envelope, Tim Holtz Ink dabber, Dylusions spray ink, VersaFine Ink, paper snipping scissors. 

Start by stamping your dog on plain paper and scrapbook paper... 
Then cut both pieces out

I also used the paint dabber to edge the envelope for some focal texture. 
(I also used the dylusions to add some pink splatter for background interest)


Love the Cheers stamp too!!

Look how cute this pup is!! 

Wednesday, April 16, 2014

Art Journaling using Viva Las VegaStamps!

I'm here with a fun tutorial on creating beautiful faces in your art Journals using Stamps!
 Who says you have to be able to draw to art journal?


 Have a peak at the first video for a quick and easy tutorial on how I created the beautiful face below. 
With rubber stamps you can create a completely cohesive piece without knowing how to draw!

(Part 1 The making of the face)


You can watch part 2 HERE 
If you're still playing along HERE's part 3
Finishing touches HERE for part 4

Supplies list in cast you want to play along: 

Rubber Stamps:

Large Arrow Heart 2 x 1 3/4, Chicken Wire 3 3/4 x 4 1/2, The Usual Suspects 3/4 x 3, Flying Eye Insect 2 3/4 x 2 1/4, Harlequin Diamond Background 4 1/2 x 5 3/4, Number Strip 1 1/4 x 3 1/4, Plate 1428, Plate 1430, (in the example below I also used: Large Lightbulb 2 x 3)

Acyrlic paint in various colors (I used: pink,yellow, medium skin, green, aqua, white)
Paint brushes (various sizes)
Paper/Art journal for you to work on (I used vintage sheet music)
Scissors (because you never know)
Black permanent marker (Micron or Zig Vellum writer are my preferred markers)
Washi Tape
Gel Medium or Mod Podge (or your preferred adhesive)
You could also use scrapbook paper and word cut outs


I hope this inspires you! 
Please share what you create I'd love to see your art too!!


Tuesday, October 29, 2013

I'd rather be in Paris...

Hello Again!!!
As promised, today i'm sharing my 3d Shadow Box Card that I made yesterday.
 I absolutely love how it turned out!!! 


from the side here you can see that this card has tons of dimension.

Close up of "Carpe Diem" on the bow

I went with a Tim Holtz/Vintage feel but chose to challenge myself to use only Viva Las VegaStamps! (Which really wasn't much of a challenge since they have so many amazing images & sayings!!)
 As I'm sure you probably guessed I am loving my new vintage camera man stamp! 

Supplies Used: 

Victorian Cameraman 1 3/4 x 3 1/4


Scrapbook Paper
Wild Orchard Roses
Various Tim Holtz bits
Black StaZon ink

Saturday, August 31, 2013

Last VLVS August Inspiration Board Challenge Submission

Ok, so I was in so inspired, by this months VLVS inspiration board that i decided to create one final piece before the submissions closed. For this piece my inspiration drew mostly from the pink & tan, the stitching, the writing and the rose.  


I created this 12x12 scrapbook layout for my mother of her before her wedding. Her wedding colors where shabby pink and green, so I stuck mostly to those colors (plus that way I got to play with her NEW green Inka Gold that she just bought!! haha)  The Viva Las VegaStamp I used was:


I thought this was perfect because these are some of the happier moments of her life, She finally has a man whom treats her like a queen (as all women should be treated of course!!)  I was going to add some of the many other great phrases by VLVS, but That one seamed to say it all for me.  I hope you all enjoy!


Wednesday, August 28, 2013

WOYWW #221

Hello Everyone!


Wow its Wednesday again already!? 
Don't know why i'm showing you my mess? Hop over to Julia's to read more about our world wide tour of work desks every Wednesday.


Well my mess is still huge, everywhere and growing! I've had a busy week and it's only going to get worse! I go back to school Friday ...not looking forward to all day long micro-biology... But who knows I may love it.
  I'm still working on some custom order mini albums and have other orders to start.


Here is a close up of the tags (these are also all spoken for after having made the pink one a while ago i knew i had to make some other fun colors)


Another mess I'm working on is this layout... Hope to finish it soon!


I have been playing some more with my Silhouette Cameo this week and created the box below

Close up of the medallion


I also made some texture  paste, which you can see i tried out below


 Also now that I have the amazing paper for the sides of my box redo's I hope to start on those soon! (thanks to my pal Mandy for those! Check out her blog HERE ).


Wednesday, August 21, 2013

Happy WOYWW #220

It's that day again...Yep the one where we check out everyone's crafty spaces all over the world... In my case you get to see my messes! You can read more about it HERE 

OK, No judging now... I know I have a lot of messes & Projects going, on, but i swear my desk was clean 3 days ago!! 
I have been busy working on some custom order mini alums for one of the Dr's I work for, and when i need a break from that I have been playing around with some other small projects & trying to get some pieces made that i need to mail out... 
(yes Carrie, I'm still working on yours...nope Its not pictured today...It has to e a surprise..hehe) 

Ok, here we go...lets dive in!

 
Above is the custom robot mini I have been working on almost non stop..I promise pictures when It's done!!

 This is my mess from a side project I'm working on, I was playing with my Cameo, and below you can see a closer up view of the organizer I've started.

 Above is a chipboard BoBunny mini I also worked on when I needed a break earlier this week. 

Now you're proaly thinking could she really have anything Else going on!?! Well...Yes! I Also had my order of over 2 lb of ViVa Las VegaStamps come in!! (yes I already inked them all Up!! I love them, so you'll get to see more projects with those coming up soon too!!!) 


Oh, and since mom is out of town this week (you can check out her WOYWW HERE .I have been checking in on her babies, so this pics for her...This is Squirt her old lady pup, and she got to go to McDonalds for some French Frys about an hour ago! If you stop by her's tell her you saw her puppy!!

Sunday, August 18, 2013

Shabby Chic Halloween?

Can you have a Victorian/Shabby Chic Halloween you ask?
But of course Halloween can be done in Victorian and Shabby Chic!!
I love the look of your traditional Spooky Halloween colors and styles, but some days you want something a little different, or maybe you're creating for someone else? 

Here's a quick and simple Shabby Halloween Tag that i made yesterday. 
(sorry the photo quality isn't great, but I had to use my phone since I was not creating at home, and gave the tag away after making it :-P Also please excuse the paint on my craft mat in the photo! )

It is hard to see here, but the butterfly is popped up, and there are tiny pink pearl dots, on her hat, and the butterfly. 
The background and ribbons were dyed using Tim Holtz Stain, and Pink Glimmer mist. The extra shiny circles are Perfect Pearls, and the small pearls are liquid pearls. 

Have A Crafty and Creative Day!

Saturday, August 17, 2013

More Viva Las VegaStamps! August inspiration board fun!


Good Morning Everyone! 
It looks like it's going to be a beautiful Saturday, and thanks to my spoiled rotten dog barking at 6:20 am I've been awake for a while, so I decided to play some more with the Viva Las VegaStamps August's Inspiration Board Challenge.

Here is what the inspiration board looks like: 


I took inspiration from various Elements on the board, and also decided to do some scoring since i have been inspired by the blog hop between Viva and ScorePal all week :-)

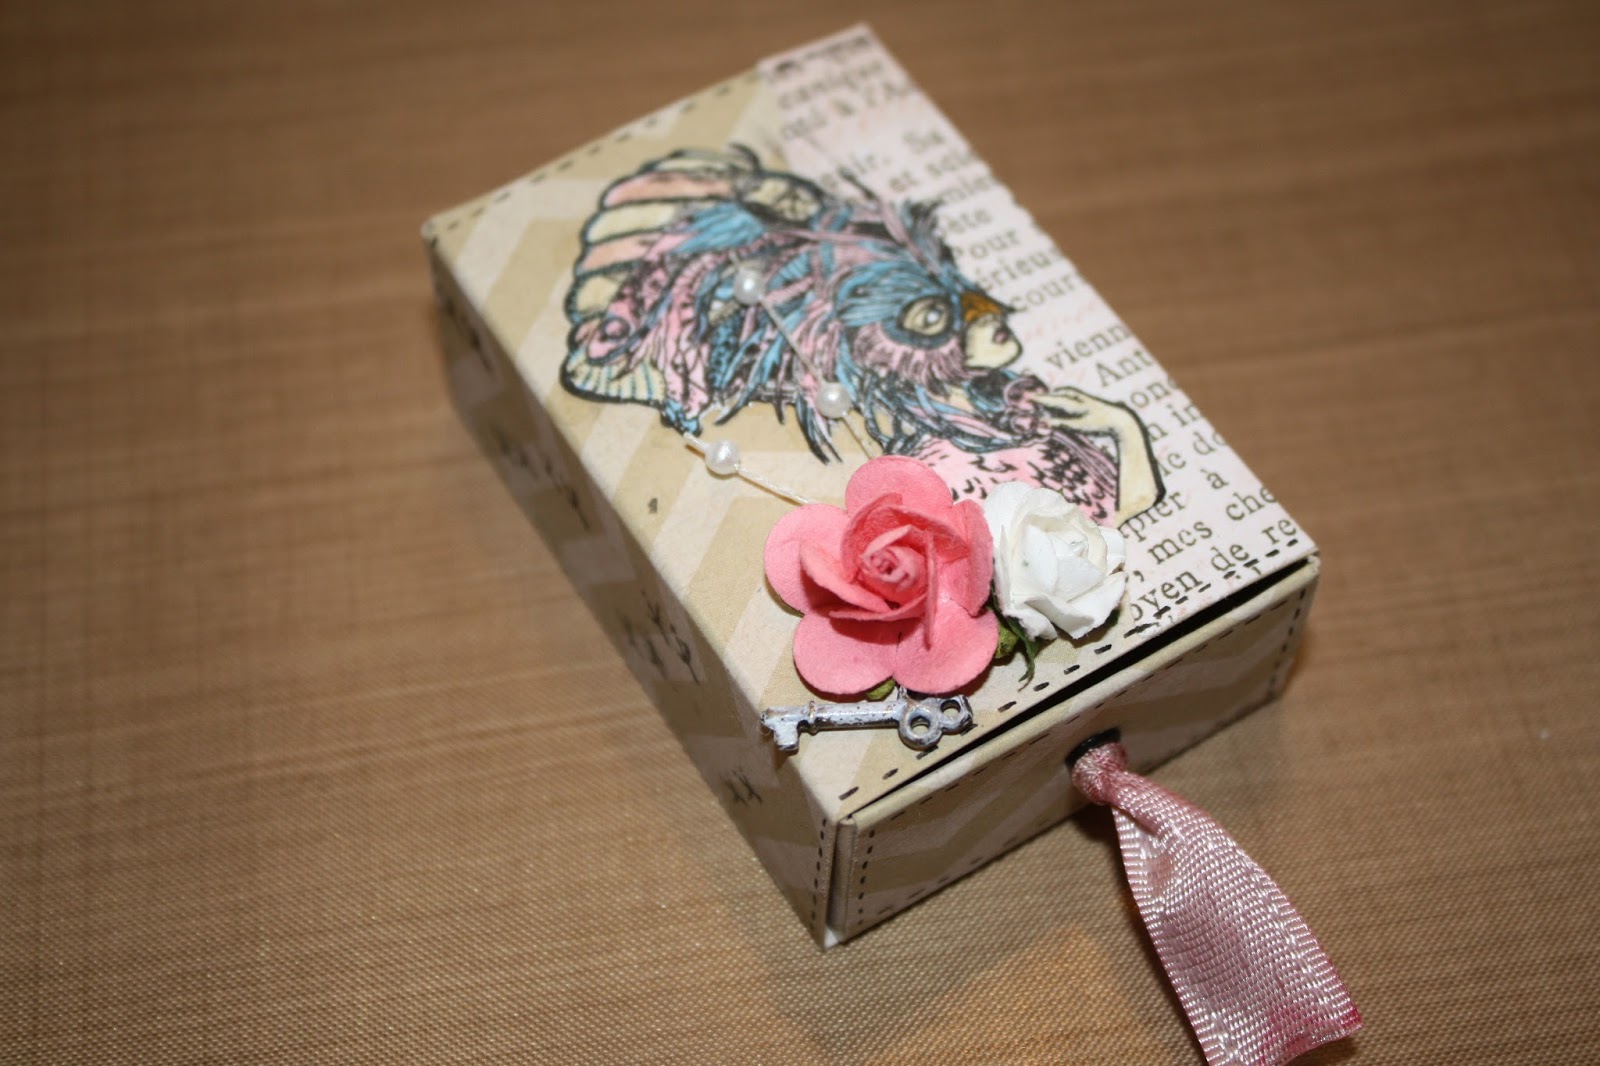
I created a match box/mini gift box 

I started by cutting out a matchbox template with my Silhouette Cameo, and by stamping and coloring the Beautiful Mardi Gras Lady AKA "my Bird Lady", then cutting her out


Next I scored and folded my template. I also double checked that She fit nicely. 
After checking I drew some stitching on the edges using my micron pen, and stamped the bird tracks down the side panels. I glued everything in place, and finished embellishing. 


 Here are a few different angles, I hope you all enjoy!


(also you can see my pup doesn't feel guilty for waking me at all!)

Thursday, August 8, 2013

Viva Las VegaStamps August's Inspiration Board Challenge

Yay, My 1st Monthly challenge submission for Viva Las VegaStamps. They have just brought back the monthly challenges (although I didn't know about them in the past) I am super excited to participate in them now! 
This months inspiration board was this-----> 

I absolutely love the colors and everything about it! 
For my inspiration, I drew from the colors, the roses, the crown, the stitching, and the text. 

I knew instantly the 2 stamps i wanted to use: 

                
Here you go here's where i was inspired to go with my tag:


For my tag i started with a background piece of paper from the Bo Bunny Gabrielle 6x6 collection, and added it to a 6 1/4 x 3 1/8" #8 Manila Shipping Tag. This started be off with the color scheme and the background text. I added a doily, then stitched around the tag using white thread to keep the romantic shabby feel I was going for. 
Next I stamped the Crown on a separate piece of card stock and fussy cut it out. I then adhered it with a pop-dot for added depth. (This crown stamp is so detailed it almost looks 3D on its own! Love IT!)
The Journaling card is a digital collage piece made by me, which i added to start bringing the rose part of the inspiration in. From there Everything just fell into place. I added the lace boarder, stamped the "Treat me exactly as you would the Queen", added the Tim Holtz fragment Doll, wings, number plate, and grunge board hinges which I painted with white picket fence crackle. 
I also used both stamps to hand stamp the ribbon and seam binding to match. 

Thank you for stopping in, and I hope you all enjoy my take on the Challenge! 
Happy Crafting everyone!