Free background from VintageMadeForYou
Showing posts with label progress shot. Show all posts

Saturday, May 31, 2014

King of Imagination? ~Edgar Allen Poe~

Mixed Media Blog Hop Welcome to the IMAGINE Crafts and Viva Las VegaStamps! Blog Hop. For the next week, our two design teams will be featuring some amazing projects featuring products from both our companies. Amazing stamps require amazing ink, right?

Mixed Media Prize Package

We're proud to announce your chance to win one of three different Mixed Media Prize Packages from IMAGINE Crafts and Viva Las VegaStamps! You have until midnight PST on Sunday, May 31st 2014 to comment on as many of the Design Team Blog Posts from this week as possible. On Monday, June 1st we’ll draw three random blog posts and one comment from each of those posts will win a prize package!

Ready for some inspiration from our artists?

Here's today's posts from IMAGINE Crafts:

And from Viva Las VegaStamps!:

  If you're just joining us on the Mixed Media Blog Hop, here' the links to the previous days posts: Saturday, Sunday, Monday, Tuesday, Wednesday, Thursday, Friday   ***Blog Hop Hint – if you click on a link that takes you to a page saying something like, “Sorry this page cannot be found” just click on the header at the top of the blog (usually a picture or the blog’s name) and it will take you to that blog’s most recent post. That post *should* be our hop. If not, you can probably scroll down a short way to find the hop post.


Hello Everyone!!! 

Today I am Super Excited to share my Edgar Allen Poe wall hanging that I created for a swap with Viva Las VegaStamps and  Imagine Crafts / Tsukineko
I got really into detail with the picture taking for all the steps of this piece so grab yourself a cup of coffee and get ready for some inspiration!!!


Supplies:
Viva Las VegaStamps: 

Waybill/Invoice Background 4 1/4 x 5 1/4


Imagine Crafts / Tsukineko:
Momento LUXE Black, Momento LUXE Teal Zeal, Momento LUXE Bahama Blue, Momento LUXE Morocco, Momento LUXE Pear Tart, Momento LUXE Dandelion, Momento Neon Electric Blue, Ink Potion #9, IrRESISTable gold texture spray, VersaFine ink in Sepia, Kaleidacolor in Caribbean Sea, Delica Silvery Shimmer Ink (BTW the Best Metallic ink I've seen, it is super metallic and amazing!!), Tsukineko sponge Daubers

Other Products I used:
4x6 photo paper, black cardstock, book pages, UmWow Studio Gears, Tim Holtz Metal Embellishments, Grunge board key, Glossy Accents, Washi Tape, Perfect Pearls (patina set), sewing Machine, Wire, Non-stick craft mat


Start by rounding up all of the colors that inspire you, (yes I played with a lot!! But all of the different Blues, Greens and yellows just play so well together!) 


Starting with at least 2 colors push the ink pad onto your craftmat, then spritz with Ink potion #9

(be sure to leave some room between your colors so you don't contaminate your ink pads) 

Drag your 4x6 glossy photo paper (or whatever you're using) through the misted colors
(note the more Ink potion #9 you spray on the mat the more your colors will run and give you fun marble like effects)

Next heat dry your background and add some irRESISTible texture spray in Gold
(set aside to dry, During this time you can make a few more backgrounds to play with..I did too!)

It should only take a few minutes to dry then back to playing!! 
Next I added 2 more colors using the same process as above

Here you can see how beautiful it's coming together!! 
I gave my piece a more weathered look by sponging on some VersaFine ink in Sepia in various places

Next I sprayed more Gold irRESISTable and quickly sprayed teh ink Potion #9 to get a fun runny effect

(While this was still wet, i dropped globs if patina Perfect Pearls on the piece to give more of a weathered metal look, and sprayed the with the ink potion #9 to really set them in place)

After Hear drying I added some of the Kaleidacolor in Caribbean Sea 
(this is SOOO pretty with this effect, and it resist the gold!!!!)

(in order to stamp the Kaleidacolor in Caribbean Sea in my craft mat i pulled it to the edge of the table so the adjuster know would be off of the table, this allows the pad to set flat on the craftmat)

Ok, If you are like me and you made more than one background pick your favorite and begin stamping!!! 
I stamped the Waybill/Invoice, then stamped the Butterfly Specimens in Momento Luxe Black
I also added some Washi Tape for visual interest

Next I stamped Poe in Momento Luxe Black, and used the corner of the Pad to "draw in" his shoulders 
(you could also use a sponge for this)
you may also notice that I have cit my Poe stamp from the way he comes originally, fear not I kept both pieces so he can also be used with his original frame! :-)

Next I stamped the Pen Tips with Delica Silvery Shimmer Ink, and sponged over them with VersaFine Sepia (and you can see how super Metallic and reflective its here)

next I fussy cut all of the ones I stamped so I could see which I liked best 
(I'm also showing you the backs so you can see it is really paper!! I just bent them into shape by hand)

Here you can see me playing around with the layout 
(I think I like it just like this!)

I inked and colored the Gears, then added some wire for looks, To set everything in place I filled the gears with Glossy Accents and let dry on my craft mat overnight 

While that drys I ripped the edges of my paper and distressed with the VersaFine in Sepia, and my sponge Dauber

I repeated this process with the book page and the black card stock backing
(I found It helps to adhere the book page with Miracle tape to the back of your project before distressing. Also only place the tape in the center if you intend to sew around the edges like I did, so it won't hurt your sewing Machine)

I stitched around my piece, glued the crown, wings, key and gear embellishments in place with Glossy Accents 
(allowing to dry over night)

Here you can see the rich colors and how nicely the texture sprays resisted the water based inks 


(Another Detail shot)


Thank you all for joining me!!! 
I hope this inspires you to get out your inks and stamps and play today!


Friday, May 23, 2014

Viva Las VegaStamps! DT Tryout

   Wow, it's I can't believe it's that time again! I am both super excited, and super nervous! I have loved my 1st term with the VLVS design team and would love to selected for a second term. Everyone has been so friendly and inspiring!  (If any of you see me in public, I will probably look like a kid waiting to find out if my test grades are in until the results are out...lol)  I would love to return to the VLVS design team for another term because I truly enjoy creating with your product and being able to share with your fans. I also enjoy the family like environment of the team that is so encouraging to me! 

Ok, It is so hard to decide what my 3 favorite stamped projects were/are!!! 
(I love stamping, how can I only have 3!?! Although It was hard I think I have narrowed it down though I've gone back and forth on this many times!!)
(in no particular order)

Ok, My 1st of my Favorite Pieces can only be a "sneak Peek" for my piece that goes live on the 31st HERE for the blog Hop with VLVS and Imagine Crafts... I hope you'll join us on the Hop starting on the Viva blog starting May 24th-31st

Ok, my 2nd piece is my art journal piece using VLVS you can find the tutorial HERE

And Finally Another of my favorite things to make...MAIL ART
Many of you know I am addicted to Mail Art so I don't know if I can pick just one favorite, but this set is one of my many favorites!

Ok, this was really tough to narrow down, but I'm happy to have so many favorite pieces to choose from! 
Thank you all for visiting, and Good Luck to everyone who's applying!!!


Monday, October 28, 2013

More Mail Art Madness

Hello Again Everyone!
Here is the Second Envelope in my Halloween series and a sneak peak at what I've done so far on #3. 
I hope you enjoy them!
Tomorrow I will be posting a fun Tim Holtz style 3D Shadow Box Card that I made today using Viva Las VegaStamps! I hope to see you then!


Below is the preview of envelope #3
 This is going to Dr. Jekyll's Laboratory and is headed to the Viva Las Vegas Stamp store when I get it finished :D 
(I'm still deciding on the finishing touches i want to add)

Stamps Used:

Victorian Cameraman 1 3/4 x 3 1/4

Crows by Studio G
Skull added for face in #2 also by Studio G
Stamps by Graphic 45 are: Clock, do not disturb, blood splatter and arch above door

Everything Else is hand drawn 

Don't forget to check back Tomorrow for the 3D Shadow box card!!

Tuesday, September 17, 2013

Happy WOYWW

Ok This is going to be a quick post as I have to much going on, and am STILL working of my robot custom order album (I'm finally putting all the finishing pieces on it today! I Love how it's come together! (I think i may be to much of a perfectionist though, which is why it's taking to long, plus I've not been home much the last few weeks)
I promise to try to do a video of it when it's done : D For those of you who don't know what WOYWW is read more about it on Julia's Blog, and be sure to check out everyone else's fun desks!

 (see it's self standing now!!!)

(Moss supervising from the other room earlier in the day...working in my dinning room today)

 (wow look at that dust on my mini heater! OOPS... ^^^ You can tell i just broke that out of storage!!)


In other news: 
I'll be teaching my 1st card class in a week from tomorrow!
AND
My 3rd Wedding anniversary is Thursday! (10 years together!) 
ALSO...
My poor pup cut the tip of one of his pads off somehow playing in the yard today! OUCH! (I'll spare you the picture i took of his poor foot un-bandaged, as i know some people don't like wounds)
He is doing great, finally got the bleeding to stop, and he never whined or anything! (he didn't even know he was hurt, walking around getting blood all over my white kitchen floor! We had to hold him down to bandage it since he still wanted to go back to playing ball...oh, the energy of pups! he's 1.5 years old !)

 
(look at those bandage skills! As you can see he was mad I told him he couldn't chew on it, so he's pouting in the 1st pic!)

Also Here is a quick photo of the finished shadow box card you saw a peak at a few weeks ago! (sorry the picture isn't great it was taken with my phone)


Ok, well that's all from me! HAPPY WOYWW everyone, and I hope you all have a wonderful week!!

Monday, September 2, 2013

Happy WOYWW

Hello again! It's that time again! that time where we share whats going on in our crafty neck of the woods, and get a peak at everyone else's wonderful spaces as well! I'm posting a little early this time, because I just finished cleaning my desk back off and I'm about to make a huge mess again! I decided I needed to re-organize everything before jumping back into this mini album so that I can hopefully get it finished tonight! I will be gone every other day this week and won't have ant time to get it done.... It was supposed to be done by Thursday! so keep your fingers crossed That i get it finished!


Here's a closer view (while it's still organized)

  Also here is a card I am working of for a birthday, and a mail art Envelope that's heading to France in tomorrows mail! 

Thank you for stopping in for a visit! Please remember to stop by Julia's to see all of the other crafty spaces all over the world!

Wednesday, August 21, 2013

Happy WOYWW #220

It's that day again...Yep the one where we check out everyone's crafty spaces all over the world... In my case you get to see my messes! You can read more about it HERE 

OK, No judging now... I know I have a lot of messes & Projects going, on, but i swear my desk was clean 3 days ago!! 
I have been busy working on some custom order mini alums for one of the Dr's I work for, and when i need a break from that I have been playing around with some other small projects & trying to get some pieces made that i need to mail out... 
(yes Carrie, I'm still working on yours...nope Its not pictured today...It has to e a surprise..hehe) 

Ok, here we go...lets dive in!

 
Above is the custom robot mini I have been working on almost non stop..I promise pictures when It's done!!

 This is my mess from a side project I'm working on, I was playing with my Cameo, and below you can see a closer up view of the organizer I've started.

 Above is a chipboard BoBunny mini I also worked on when I needed a break earlier this week. 

Now you're proaly thinking could she really have anything Else going on!?! Well...Yes! I Also had my order of over 2 lb of ViVa Las VegaStamps come in!! (yes I already inked them all Up!! I love them, so you'll get to see more projects with those coming up soon too!!!) 


Oh, and since mom is out of town this week (you can check out her WOYWW HERE .I have been checking in on her babies, so this pics for her...This is Squirt her old lady pup, and she got to go to McDonalds for some French Frys about an hour ago! If you stop by her's tell her you saw her puppy!!

Saturday, August 17, 2013

More Viva Las VegaStamps! August inspiration board fun!


Good Morning Everyone! 
It looks like it's going to be a beautiful Saturday, and thanks to my spoiled rotten dog barking at 6:20 am I've been awake for a while, so I decided to play some more with the Viva Las VegaStamps August's Inspiration Board Challenge.

Here is what the inspiration board looks like: 


I took inspiration from various Elements on the board, and also decided to do some scoring since i have been inspired by the blog hop between Viva and ScorePal all week :-)

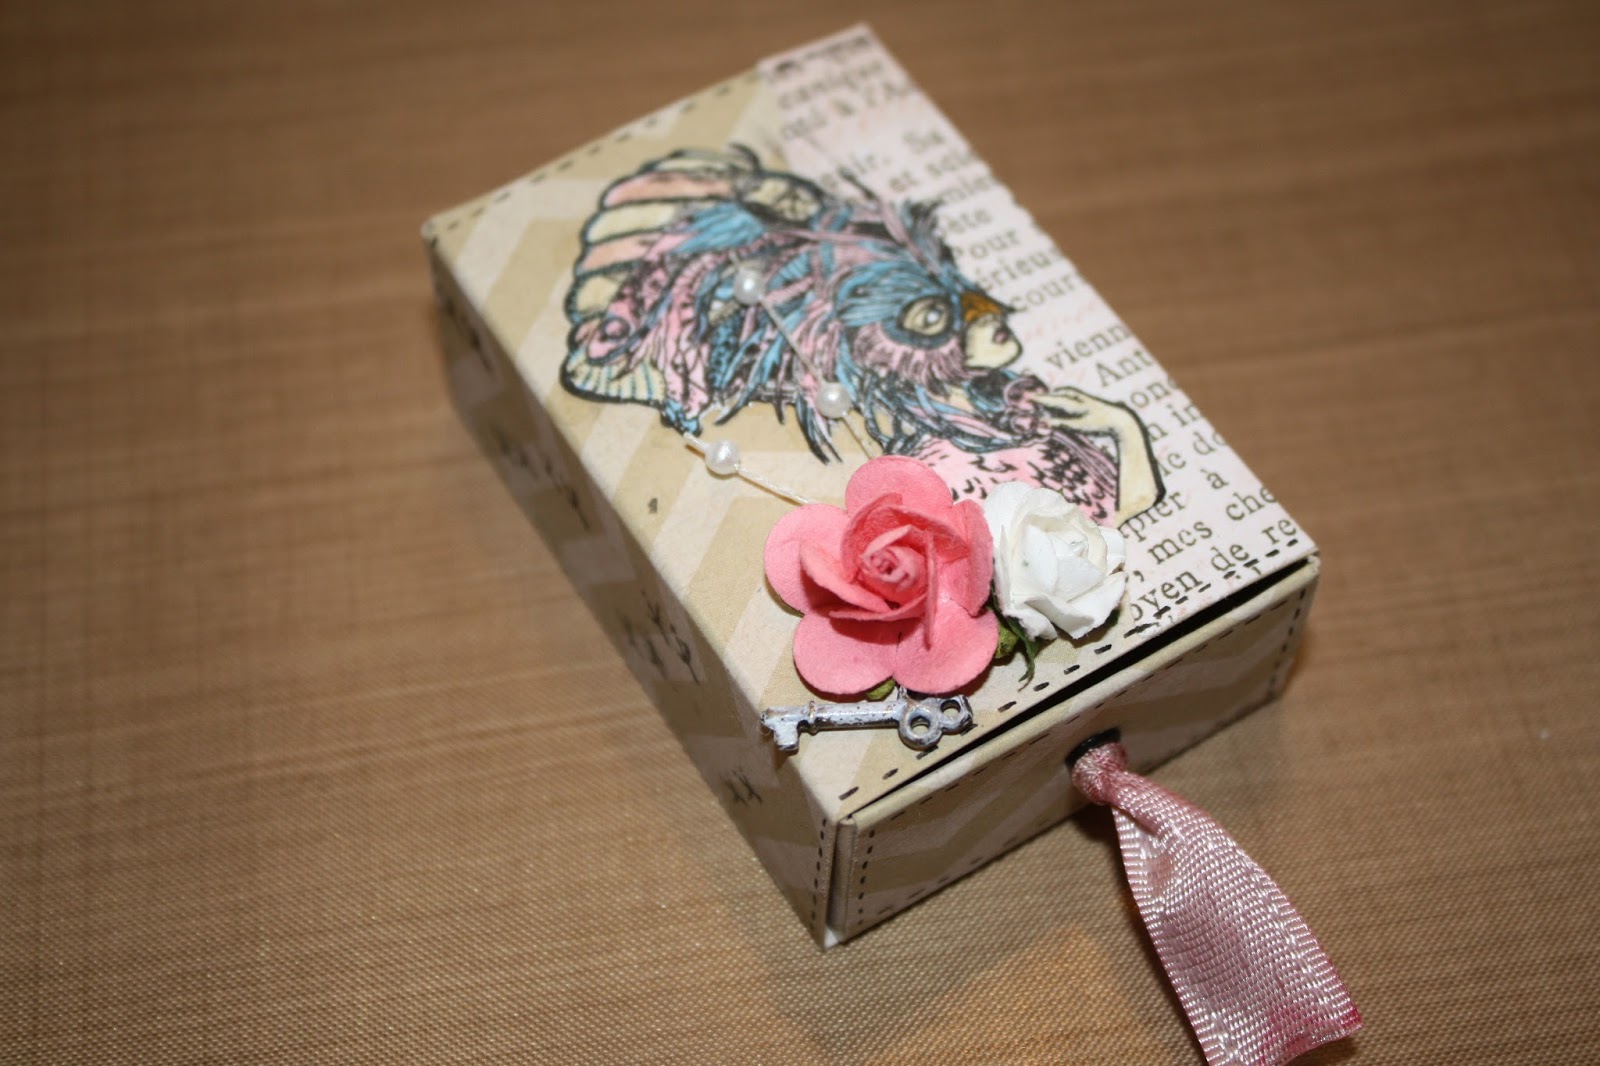
I created a match box/mini gift box 

I started by cutting out a matchbox template with my Silhouette Cameo, and by stamping and coloring the Beautiful Mardi Gras Lady AKA "my Bird Lady", then cutting her out


Next I scored and folded my template. I also double checked that She fit nicely. 
After checking I drew some stitching on the edges using my micron pen, and stamped the bird tracks down the side panels. I glued everything in place, and finished embellishing. 


 Here are a few different angles, I hope you all enjoy!


(also you can see my pup doesn't feel guilty for waking me at all!)