Free background from VintageMadeForYou
Showing posts with label layering stencil. Show all posts

Friday, April 17, 2020

Bigfoot Sighting...

Hello Crafty friends

Bigfoot, also known as the "Ohio grass man" in my neck of the woods (along with many other names), has always been a creature of lore, but you will see him for sure on the card below. 

Clearly someone has been gathering evidence?!


Stamps Used: 


Start by stamping out bigfoot and distress


Same for your "evidence label"


Next you can see a scarp from my junk box I pulled out, it has vintage photo distress spray ink on it and texture paste.

I combined all these peces plus a tag with some rub-on's (Tim Holtz "remnant rubs") to create the card below. Super Easy! Embellish with more remnant rubs, faux stitching pen marks, staples and metal clips. 

I hope you all enjoy this!
This is actually a gag card for my father-in law. 


What do you Believe? 


Monday, April 6, 2020

Easy Easter Mail Art

Hello Again!

I'm back with more cute
Easter Mail Art!


Stamps Used:


Ok, so this time I totally forgot to take some action shots. 

Start by stamping your group of bunnies, then mask them off.  Next, stamp your cross with lilies. 

You can see here I have done that then began to color my cross and flowers. 
(you can remove the mask to color, but i chose not to for some reason)

Now remove the bunny mask so that you can color them too! 
(I chose browns , because i think of "chocolate bunnies")


So, after everything was colored I re-masked my bunnies then added a layer of yellow ink over the background.  When I was satisfied with that, I used layering stencils with pink and yellow to add more details. 


Monday, March 9, 2020

Hoppy Mail Art Monday

Hello again crafty friends!


It's me Tera again. Today I am going to share a super fun and easy Easter envelope with you!

Stamps Used:


Are you ready for some colorful "Hoppy" mail?

Well, let's hop to it then...

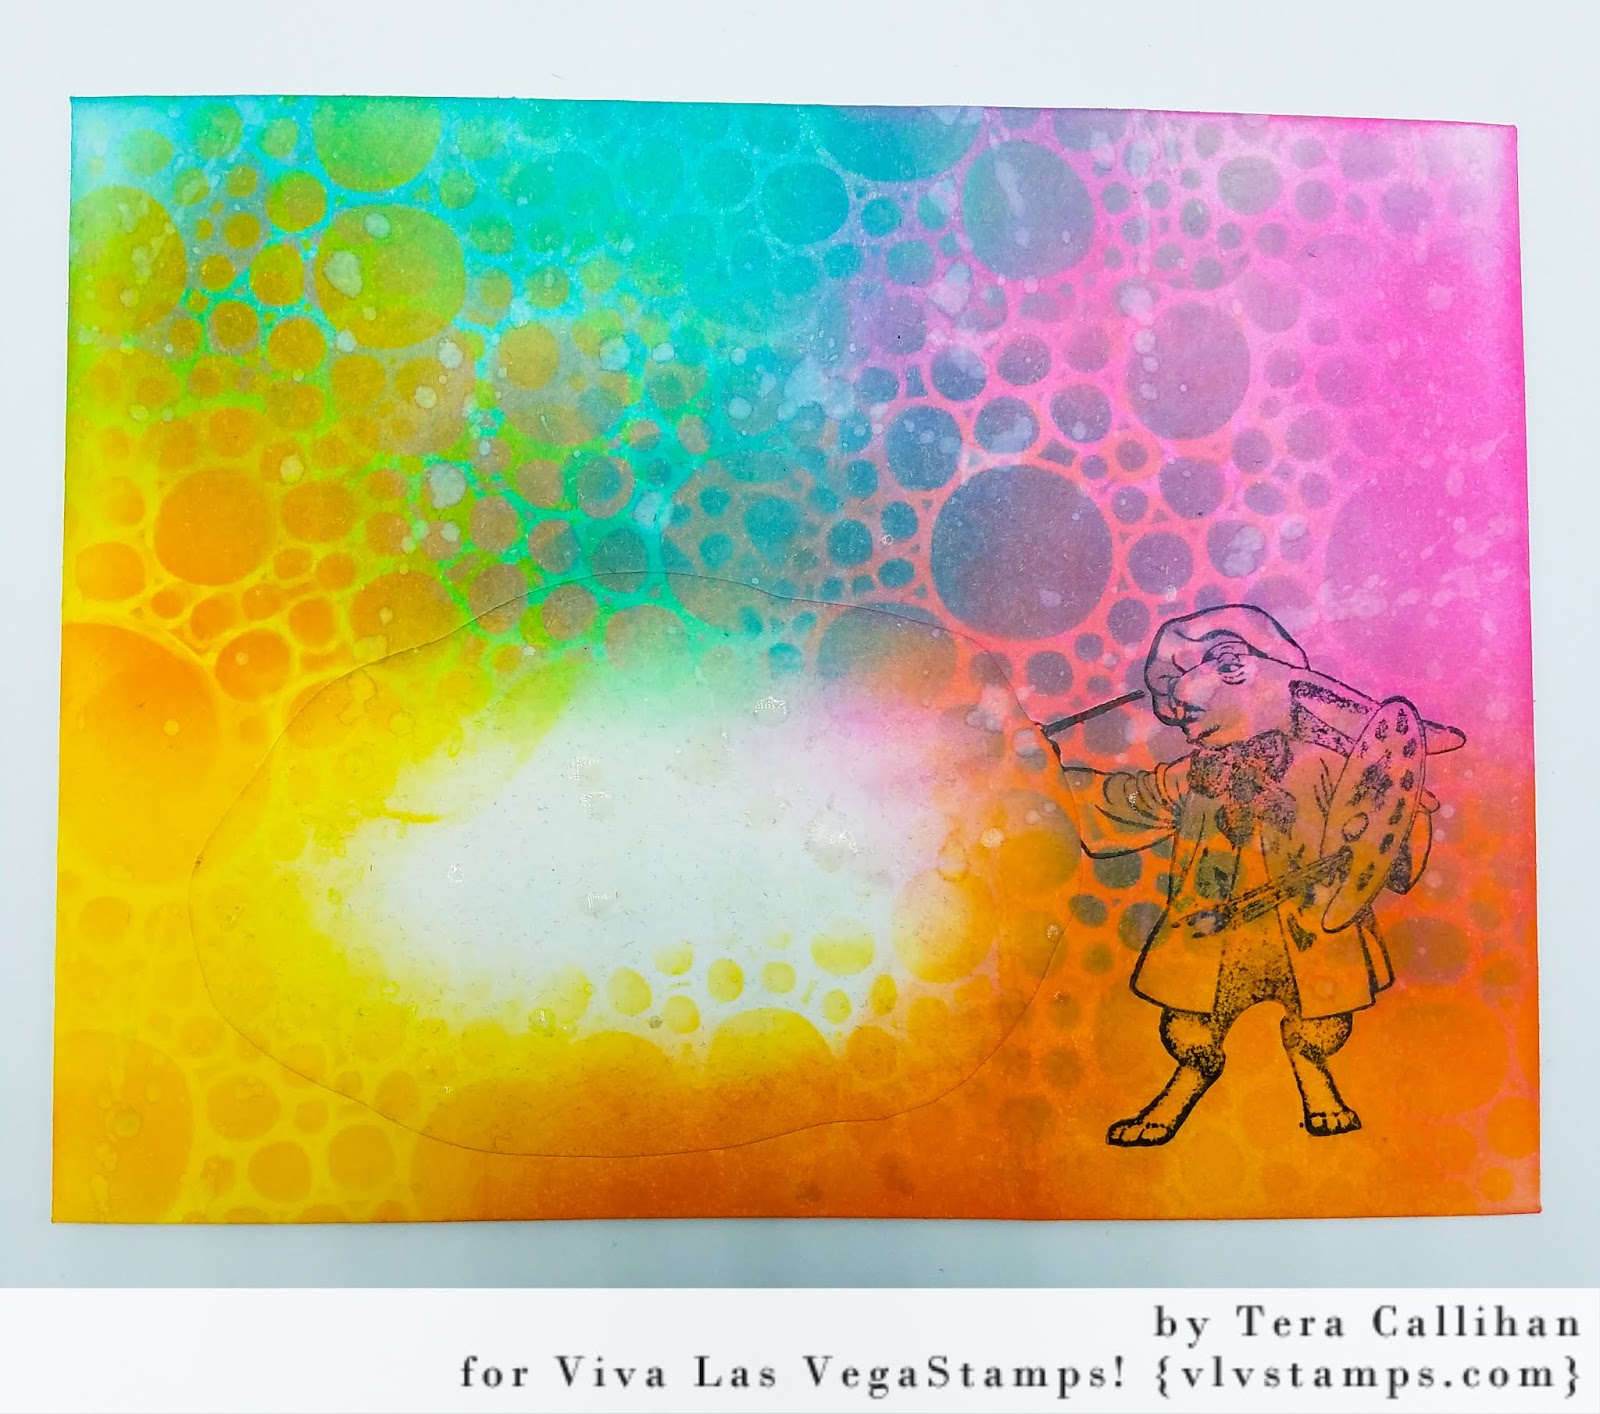
 Beginning with an A2 envelope, I stamped the bunny in black memento ink, then masked him off.  Next I cut a blob shap out of scrap paper to make the mask for the address box. 

(below is the envelope with both masks in place)

Using Distress Oxide inks (picked raspberry, cracked pistachio, mustard seed, and ripe persimmon), I inked my main background layer


Next, using the same colors through a layering stencil I added a new layer of ink for depth.  I also added a few flicks of water for distressing. 


Now for the magic....
I removed the masks to begin coloring.
(I love the reveal!)


Finally I used various markers to color the bunny and add details.
(I love matching postage so I have added one on the envelope so you can see the full effect. I may use a different stamp to mail yet, we will see...)


I hope this artistic bunny has your creative juices flowing too now!
Hoppy crafting!


Wednesday, September 4, 2019

Flower Power

Hello Crafty Friends!

Today starts week 1 of a new Stampotique challenge "Flower Power". 

For this challenge you can take it however you choose, you can do something flower based, or based of the flower power era.

Naturally, I chose to create one of my favorite things:
That's right... Mail Art!

Stamps Used:
Dirtball witch
Flos
Salutations 2


In addition to using the stamps listed above, I also used distress ink, memento ink in rose bud, various markers,  and a layering stencil.

I hope you enjoy it too!


Wednesday, June 12, 2019

Favorite quote


Hello crafty friends!

Today I want to share a fun card for week 2 of the Stampotique Originals designers challenge. 


The theme is "Favorite Stampotique Quote"


Do you have a favorite Stampotique quote?
I love this with my new stamp "Emma


Have a great day!!


Monday, May 20, 2019

Late for Facebook...

Hello, It's me again...

Today, I am here to share another super fun and easy Mail Art Monday 
card and envelope set!


You know I love snarky mail, and this one is just too perfect for so many people...
(Myself included)


Stamps Used:

I started with and A2 envelope and card base. 
I began by stamping my woman with her hands on her face on both the envelope, the card, and on scrap paper. (the scrap paper was to make the mask).

Next I stamped my sentiment on my card base then set this aside. 


Returning to the envelope, I covered my woman with the mask. I also created a mask for the address box from some scrap paper. 

With everything masked off, I began to add my background detail using a Tim Holtz shifter stencil with distress ink. 


When the background was complete, I removed my masks and colored my card and envelope with various alcohol based markers. 


I hope you all like this fun little set!!
Have a wonderful week!!


Wednesday, May 1, 2019

You're an Unusual little flower ♡

Hello fabulous crafty friends!

It's Wednesday so that means it's time for a little challenge inspiration for the Stampotique Originals designers challenge. 

Today is the 2nd week of the "Unusual Flower" challenge.

(On a 2nd post I'm also sharing extra special new releases all designed by me!!!)

Challenge blog can be found HERE

Stamps 


I hope you enjoy this funny little card.
Thank you for visiting today!!


Monday, April 1, 2019

Ignore Reality...

Hello Again, 

Happy April Fool's Day and Mail Art Monday!!!


Stamps Used:
Man with Tea Cup
Double Coffee Rings
Doodle Frame
Cow in your face
Deliver To

I started with an A2 Envelope and card base.

I forgot to take pictures until a few steps in, so I hope you understand my description.
I started by inking my man with tea cup (when inking I masked off the head on the stamp). I stamped the body in memento ink. With the body stamped and dried, I masked this area off.

Next, I stamped the cows head in memento black and masked it off too.

On the envelope, I stamped my scalloped boarder "Doodle frame", and deliver to. I masked off the address area with a small block of paper, and masked off my boarder.

(Below you can see all the pieces masked off)

With everything masked off, I used Distress Oxide inks in: mustard seed, fossilized amber, ripe persimmon, and spiced marmalade. The stencils used were the Tim Holtz layering stencils. 


The best part... removing the masks....
And coloring the base pieces.


Now, the finishing touches...
I stamped my coffee ring stamp. I added a few flicks of distress stain inks in black soot, and picket fence. I also added a matching cactus stamp.


Below on my matching card, I added a Tim Holtz snarky sticker.


I hope you all enjoy this set. This was made special for a new friend whom is also a coffee lover as well as a fan of cows. 


How do you drink your coffee? 
Mine is usually 90% milk and sugar with a hint of coffee...
AKA cappuccino, frappes and lattes


Tuesday, March 26, 2019

One for the books...

Hello crafty friends!

I hope you are all having a wonderful day!

Today, I want to share a super fun art journal page using Viva Las VegaStamps! I have this punched to go in a happy planner. I wanted something to record books I've read on.


Stamps used:

I started with my blank art journal page, and stamped my dragon 1st in memento ink. (On a second piece of paper, I created a mask of the dragon)


With the dragon masked off, I stamped my library card. I masked off the 1st library card, and then stamped it a second time.


I used distress oxide ink to color my background and for the stenciling.


Next I should have stamped my library return dates, but I did this out of order so I had to remark everything.


With all the masks removed,  I used blick alcohol markers to color my dragon. I also used nuva glitter pen to add a little glitter.


I hope you all enjoy this page as much as I do.... now, to fill it with books.


What are you reading?

Monday, March 4, 2019

Nervous Breakdown Mail Art Monday

Hello crafty friends!

It's Monday!
And, do you know what that means?
 Mail art of course! One of my favorite days of the week!!

Today I want to share an extra special piece with you is so fitting with how my last week has gone! I hope you all get a kick out of this and we'll up and matching card.


Stamps Used:

Other products:
A2 card and envelope
Distress ink- candied apple, wild honey
Archival ink- jet black
Zig clean color markers 
Distress stain- black soot

I started by stamping my angry man on both the card base and the envelope base. As well, as on a separate piece of paper to create a mask.


I used post-it notes to create my address box, which also double as a mask for this area.


Next, I partially stamped the warn clock face on the top left corner of my envelope to give some depth. Or extra added depth I then used the dictionary page for more partial stamping all over.


With all my base stamping completed, I started to lay down my ink background. I used Wild Honey distress ink to cover the entire background layer.


With my inking done I felt they needed a little bit more texture and detail oh, so I used the tiny chevrons to add extra depth in the top left since eventually there will be a postage stamp on the top right.


After the background layer was where I wanted it, I used a Tim Holtz layering stencil to add candied apple distress ink for some texture. I also use the same color to Inca round the edges of the envelope.


I removed all of the masks, and decided to add my stitching to the sides of my address box. When I was satisfied with how everything looked I used my Zig clean color markers to color my main image.


I used the same colors to color the image on the card as well. To finish everything off I stamped my quote on my card oh, and added a few flicks of distress stain to my envelope.


To give extra flair, and top everything off...I added a basketball postage stamp. 
Which is perfectly fitting, since March is called "March Madness" for basketball season. 
This guy definitely looks like he has some Madness going on.

Thank you For joining me today!
Hope this inspires you!