Free background from VintageMadeForYou

Monday, September 21, 2015

Witchy Halloween Mail Art Video Tutorial

Hello again! 

Today I'm here with another fun installment of Mail Art Monday!!!


Here in Ohio the air is getting crisper, leaves are falling and I'm loving my spiced tea and coffees... Fall is such a fun time!


 So today's tutorial is a fun Halloween themed envelope and postcard. 
(Stamp links at the bottom of this post)


And speaking of fall themed postcards don't forget to stop by the Viva Las VegaStamp! Groupies on Facebook to join our swap!!!  I know I was so excited for this swap! I'm mailing my 4 out this week (don't worry they are still taking sign ups and they aren't due to be sent for quite a while).

Stamps Used:

Jack o' Lanterns Along Fence 3 x 2 3/4


Thank you for visiting! I hope you are feeling inspired.  Stay inky!

Monday, September 7, 2015

Mail Art Monday Spooktacular with VLVS

Hello again!!!

Today I'm here with a new spooky take on our Mail Art Mondays! 

(also Happy Labor Day!)


This  time I want to share a piece to get you ready for some fun Halloween mailing!!!
(Who doesn't want to scare the mail carrier every now and again!?!)


Stamps Used:

Bell Jar 3 x 4 3/4


Thank you for stopping, Stay Inky!!

Saturday, September 5, 2015

Artful ATC's

Hello Again!!! 

Today I'm here to show you some super fun ATC's using 

Lost Coast Designs And Carmen Veranda stamps


( I LOVE Artist Trading Cards!!! They are so fun to make and collect!! and Now you can even add the to Pocket Letters!!) 

Stamps Used:   

To Create these ATC's I started with some Scraps of painted art journal paper given to me by my mom (Her blog is HERE). They were created with Dylusions paints and various stencils. I cut 3 pieces to 2x3in for stamping on and 3 pieces to 2.25 x 3.25 in to matte on. the final layer is black card stock in standard 2.5 x 3.5 in. I stamped my images on the top layer of each and set them aside to dry (ink on paint can some times be temperamental... although this paint plays well with stamps)

While the tops dried I glued the bottom and middle layers together. 
Next I glued the stamped images to their bases and used a fine tip black pen to draw on some faux stitching.... (I love that it pulls the layers together). 

Lastly I added a few hints of color to small parts of each card to help different features stand out a little more :D   Detailed photos below 


 I hope these inspire you to create some fun pieces too!! I Just love how these came out!!! :D 

Monday, August 17, 2015

Mail Art Monday Continues (video tutorial)

Hello Again! 

It's me again

 I am so excited to share the 2nd official Mail Art Monday tutorial with you!! :D 
(there is also a sneak peak of what I'll be sharing in September in the video so you can be ready for halloween!! )


I hope you will join us for the next Mail Art Monday in september!! :D 
Stay Inky!! 


Friday, August 14, 2015

Puppy Love

Hello Again!!! 

It's me again with some more fun and easy inspiration for Lost Coast Designs!!
This time I want to share with you how I made this fun and easy tag for the Circle challenge!!! 
(Have you been over to the challenge blog yet to check it out? Don't forget to enter yours for a chance at a prize!!! Plus there's a lot of fun inspiration over there!!  Check it out HERE ) 


To start I used a #8 tag (the XL one) and added pink and yellow distress stain around the edges. 
(I heat dried it since i have very little patients lol but you can set aside to dry if you'd like) 

Next I stamped my ADORABLE party hat dog (found HERE) in black ink... Isn't he the cutest????

Next I used two of my TCW grunge stencils (pictures of the stencils in my post on June 27th HERE if you'd like a visual ) I sponged black ink through the stencil to add the circles. 
To finish I shadowed around the party dog with my black sparkle pan pastels 
(you can also do this with ink, but i had mine handy). 


See, I told you it was easy!! 
Wouldn't this make the cutest party invitations???  
Or maybe a Doggy Birthday card!!!

Thank you for Hopping in to see me today!!!
Happy creating!!

Monday, August 3, 2015

Mail Art Monday Video Tutorial

Hello Again, I'm here again with some exciting news...

Not only is this our first official Mail Art Monday Video Tutorial, But...

More Mail Art Monday Video Tutorials are to follow!

That's Right!! 

We are going to have mail art Mondays, at least 1-2 times a month and at least one of those will be a video tutorial for those of you like me who need to see the process in real time.

As many of you know mail art is my main crafty love, so this is super exciting to me!!! 

I'm so excited to share the process with you and hopefully you pick up some tips and tricks along the way!! 

Ok so here is the first Envelope for the 1st official 
MAIL ART MONDAY Video Tutorial!!!

Viva Las VegaStamps! Stamps used: 

Pair of Butterfly Wings 


Striped Leggings

Wednesday, July 29, 2015

Mail Art Crazy

Hello Again! 

I'm back at it....
Getting back to my mail art :D Here are some of the most recent pieces :D :D
(Photo heavy)


Thank you for stopping to take a look!
If you are interested in buying any of my mail art keep an eye on my etsy I will be listing a few pieces there since some people have inquired. 
(and lets be honest college is keeping me broke! lol).

Thank you for all of your support!!

Tuesday, July 21, 2015

Texture Stamping Delight

Hello Again!

I'm here to share with you how I created my piece for our new stamp release and grand opening of the Lost Coast Designs Portal to Creativity Challenge Blog 


WARNING 
today's post is very PHOTO HEAVY so grab a cup of Tea or Coffee and Enjoy the show... lol


Supplies: 
Agregate background stamp found HERE 
Black ink (I used Archival)
Distress paint dabbers in: Pitch Black, Cracked Pistachio, Evergreen Bough, and Espresso (optional)You can also use regular acrylic I just like that these are fast and easy...lol
A piece of embossed board (this was the thin cardboard you get when you order postage stamps online... I misted it with water before running it through my big shot to help it take the embossing while it cut) 
Gold Foil and Glue
Heat Gun and Eyelets are OPTIONAL 


Don't panic this is an easy step by step :D 

Start by painting your embossed board black 
(then I heat dried mine)

Next, lightly go over the top with your cracked pistachio and evergreen paints 
(kind of "dry brush" it... you don't want your dabber too wet)

This is were I added a TINY hint of brown for depth... 

Next I stamped my crackle background for the 1st layer of depth then I dry brushed some glue a crossed to add my gold foil

OOPS... too much...lol So i went over some with the evergreen again... 

Ok that's better... Now stamp the crackle stamp on top in black to get a truly stunning finish. 
If you want you an also add Eyelets and ribbon to dress it up a tad more.

I love the idea of this as a cuff bracelet, bookmark, or even a book binding on a mini album...
 really the possibility are endless!!!

I hope you Enjoyed seeing my process! 

VLVS and Pocket Letter Pals

Hello Everyone!! 
Have you heard of the new fun craze in the crafty mail world? 
It's called Pocket Letter Pals!! Read about it HERE or a short video HERE from the woman who started it. 
I am in love with creating these!!! 
Naturally I love creating ATC's and you know any excuse to create a decorative envelope gets me excited!! So, needless to say this new trend is right up my alley!!!

 I hope you all love what I have to share with you and give it a try also! I know you will love it too!

Other supplies: 
 Dylusions paints (or whatever you want to create your background with)
Black Ink
Memento Ink in pink (optional used for some background stamping)
Scissors for fussy cutting the owl out
pink marker (color in top right card)
White Gel Pen (add highlights and depth)
Black Marker (to draw "hello")

I started with these super fun painted backgrounds (these two were actually created for me by my mom :D whom is also a craft addict! her blog is HERE)


(owl card created from this sheet)


Next I cut the paper up into individual cards measuring 2.25in x 3.25 in (if you don't want to mount yours on black standard ATC size is fine also)... NOW the fun begins!!!

(Here you can see how my layout started...
and
from the final picture you can see things have been moved around some)


I start by arranging my base cards so that they are pleasing to the eye.. then I start stamping :D I like to add something tea or coffee related since people often send these items with thier letters, so thats what I start with. my next step is usually my "Hello" or about me card. From there i tend to bounce around adding qoutes, and things that blend nicely and make me smile :D 
(Feel free to simplify yours I got super excited and went stamping crazy!! )

Below are some close up - detail shots


(the boots and fish are my 2 favorites... :D )


(had to share one more close-up of this one! I love it!!)


(with VLVS there is no limit to what you can do with these things! Some prefer to work by theme, or style or even color inspiration... Heck you could do cats, dogs or things that start with a specific letter..lol) 

I hope you feel inspired and as excited as I am about these! Let us know if you'd like to see more Pocket Letter inspiration!! 

Saturday, July 4, 2015

The Secret is out......

Hello Again Everyone!!!

I Have Exciting News!!!!!

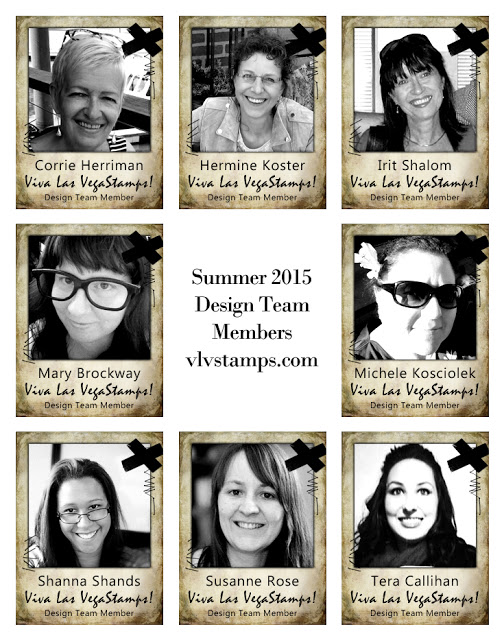
I can finally announce that I'm back creating with Viva Las VegaStamps! After my crafty break I needed to get back to creating so here I am creating with these AWESOME ladies again, and a few new faces!!! 
Tera Callihan (You are Here) 

I want to send out a thank you to VLVS for allowing me back, and to all of you wonderful people who support me and my art!! This term I plan on getting back to my love of Mail Art and also sharing some of my new love for Pocket Letters!!  I will officially be posting after mid July on the VLVS blog so keep an eye out for fun new inspiration!!