Free background from VintageMadeForYou

Wednesday, January 10, 2018

Things with Wings Postcard

Hello Friends! 


Today I have want to share a 4x6 in postcard that I created for the Stampotique Facebook Swap for this month...The theme is "wings"

Stamps Used:
Clothes text (Stampotique)
Floating (Stampotique)
Doodle Leaf (VLVS)
Reverse Image stamp (VLVS)

Other Products:
Distress Inks (regular and oxides):
 worn lipstick, picked raspberry, abandoned coral, ripe persimmon, spiced marmalade, carved pumpkin, fossilized amber, mustard seed

StazOn Ink- Black
Micron Markers,
White Gelly Roll pens
Zig Clean Color markers (various colors)
Wink of Stella -Glitter Clear
Scrap paper to create "masks"
Tim Holtz Layering stencils
Dylusions Stencil


I began by stamping all of my base images and masked them off.  After my base images were masked, I began layering my base inks. I used various distress inks, starting with the originals, and adding some oxides later. 


You can see the base layers building up here...


To add depth I like using stencils.  For this one, I started with distress layering stencils.  I also used one of the dylusions stencils. 


My favorite part is always removing the "masks" ...
Below is the reveal isn't it fun how it "pops" off the page?


For all of my coloring, I used Zig clean color markers. 
 I added my details with micron and gelly roll pens. 


I hope you enjoyed this mini post. I love how vibrant this came out :D 
If you have never joined the facebook Stampootique swaps you should definitely check them out!!!
They have one each month, lots of amazing artists!!! 

Swaperoo Postcard

Hello Friends! 


Today I have want to share a 4x6 in postcard that I created for the Stampotique Designers Challenge "Swaperoo" was the theme. You can check out the info HERE and join yourself!! :D 
(The basics are to switch bodies and heads...)


Stamps Used: 


Other Products:
Distress Oxide Inks: worn lipstick, picked raspberry, spiced marmalade, fossilized amber
grey ink (can't remember the brand)
Stazon Ink- Jet Black
Distress Ink Stains- Picket Fence 
Tim Holtz :small talk" stickers
Micron Markers,
White Gelly Roll pens
Zig Clean Color markers (various colors)
Wink of Stella -Glitter Clear
Blick Markers (various colors)
Scrap paper to create "masks"
Tim Holtz Layering stencils
Dylusions Stencil
Gold foil sticker tape (from an old swap)


Start with card stock cut to 4x6 in.  "Pretty Zara" was stamped first.  (I was careful to ink only the parts I wanted of the head and collar).  I then masked this part off with scarp paper.  I carefully stamped the Body of "angel squared" over this mask.  

Now that you have the base image,  you can begin building up the base and background. I chose pinks and yellows for this (colors listed above in supply lists) 


Once you have some base color added you can start adding background stamps and stencils.  I began with "circled lines". then added various layers of stenciling.  When I was satisfied with this I added some texture with "texture cube 1". You can do it in any order you choose. 

I also Added some white details with my gelly roller, and some black with my micron. 


Now, the best part.....
Take off the mask...
(I added my distress stain after removing the masks, but yo may choose to do it before)

Sorry I forgot to take a picture here...
I colored with various markers (zig and blick)

Finish everything off with a fun quote, and some gold foil. 


I hope you have been inspired to make a "swaperoo" of your own :D
Have a fantastic day! 


Saturday, July 15, 2017

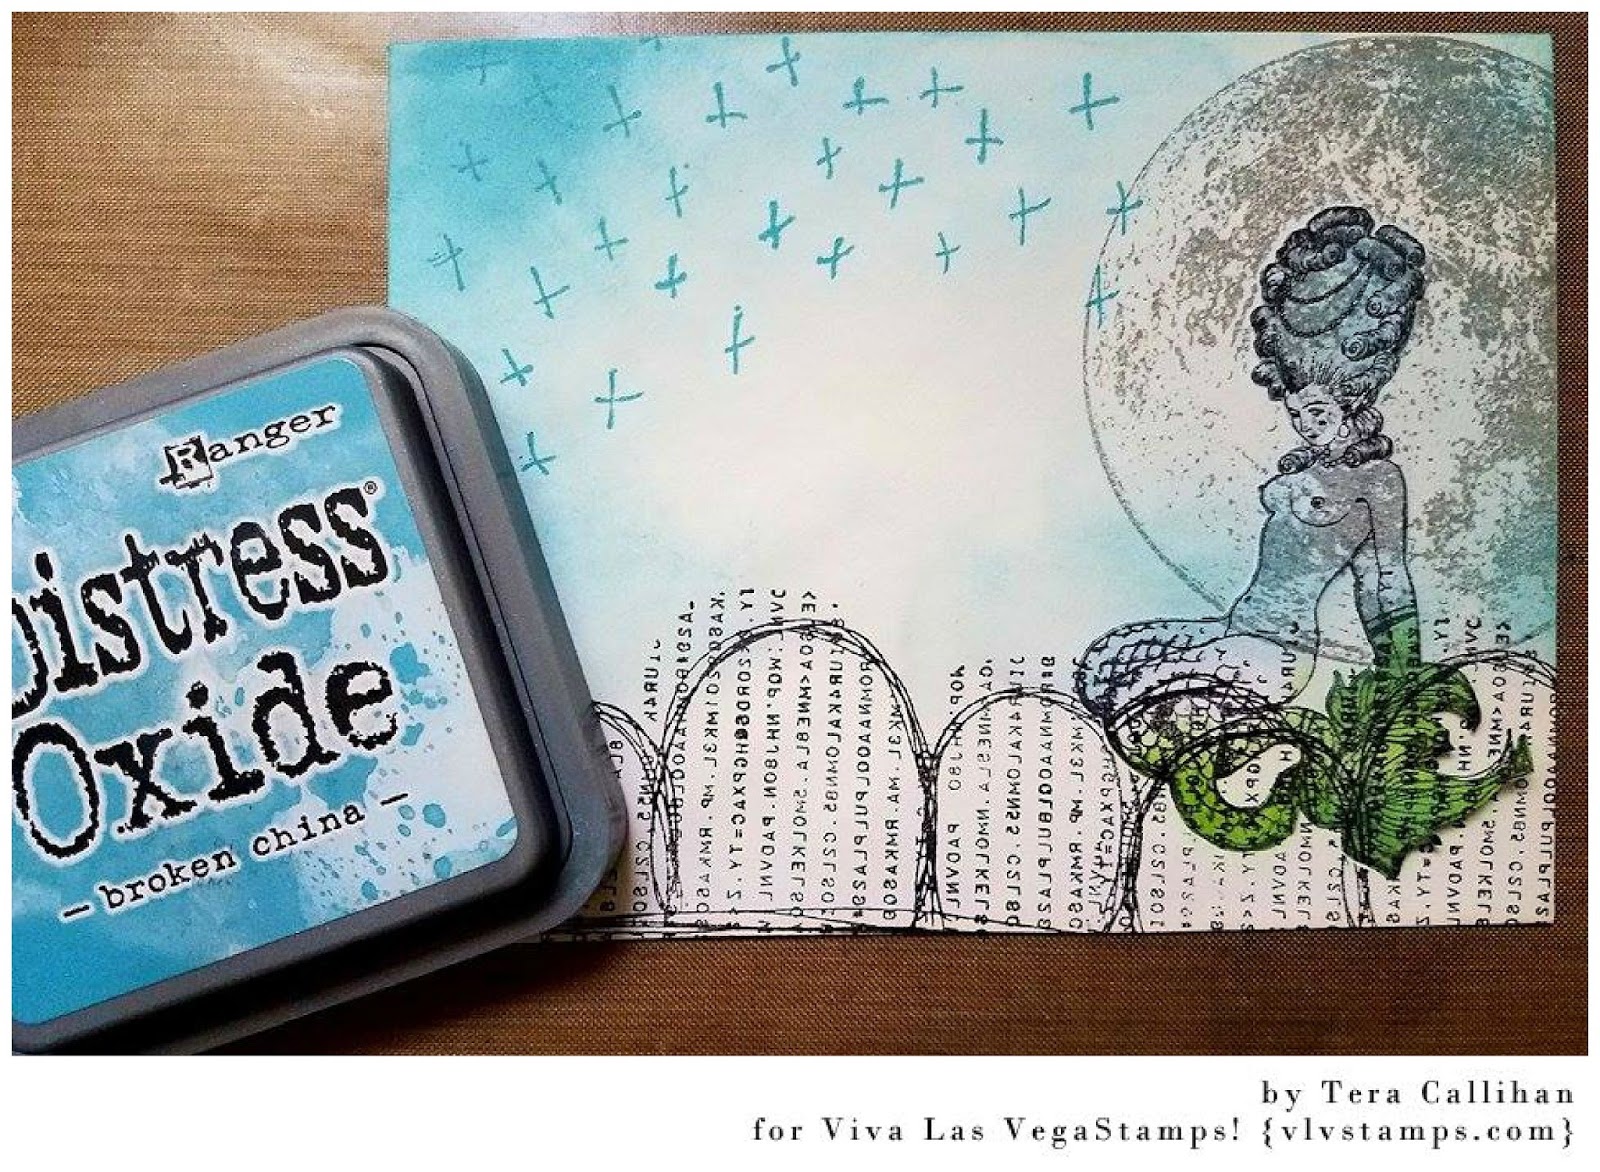
Mermaid Dreamer Mail Art

Hello Everyone!!!

It's me again,here with a surprise guest post for VLVS...

(I'm taking a little time off from my design teams for a bit to re-spark my creativity)

Once again, I want to share some super fun Mail Art envelope using some of the new releases.  For this, I was inspired by this months challenge "Summer"

(Warning Photo Heavy)


Stamps Used:
Plate 1495
(you know you are going to want them all of you are anything like me!)
Row of Scribble Circles
Typeset Scallop
Row of Numbers
Punchinella/Sequin Waste
The Moon
Fancy Mermaid
She was a Dreamer

Start by stamping out your mermaid on the envelope (A2) and on scrap paper for your mask.

Next, Using Momento ink "London Fog" I stamped the moon over the masked mermaid.


Using Memento Black ink I added my base for the mermaid to rest on.


To build the background I stamped the x's as my stars, and inked with Distress Oxide ink "Broken China"


Now to add some contrast, I sponged on 2 of the green inks from my kaleidacolor inks.


Time for the reveal... I love seeing things come together after the mask is removed. 
I also forgot to take a picture before I stamped my 2 pieces in Distress ink "Blueprint sketch" to help frame everything.  I also added a but more color around the edges. 

I also added the numbers along the right side in black Momento ink.


Here you can see where I have started the base colors on my mermaid...
I also stamped my sentiment "she was a dreamer" and outlined it with white gel pen to help it pop off of the page. 


(The left if the finished mermaid. You can see some of the added glitter details from the Wink of Stella pen.  On the right side you can see more of the color building.)


Well, there you have it! I love how this envelope came together. I hope you all enjoy it as much as I do!!


Wednesday, June 28, 2017

Genius Ideas...

Hello Again Everyone!

Today I want to share a card that I created for the Stampotique Originals Designers Challenge"Use Stencils" 


For this month we've teamed up with Eileen Hull to create something extra fun for you.
This is my book of "genius Ideas"
(Basically my cut and paste book of random bits I have created)

Stamps: Topher, Alpha Background 
Stencils are by Tim Holtz, Dylusions paints, Black Momento Ink, White Gelly Roll pen


More picture to come :)
(I have gluess some of my favorite Stampotique pieces inside!)

Friday, June 16, 2017

VLVS monthly challenge inspiration (art Journal)

Hello Everyone!
I'm here again with some fun inspiration for this months challenge board.  


It feels like ages since I've played in my art journal.  
This piece was super fun, and I plan to journal on them later. :D Some days you just need those pre-made bases for when the moment hits! 

Stamps Used:


You can find the challenge Info HERE


I started with dylusions paints, a variety of stencils, and some Tim Holtz washi tape. I used gel pens and markers to add details


Next I stamped my main images ... Which of course begged for more doodling.
(I love these stamps!)


Next I added some of my "art journal-ish" fun stamps (yes I know I use these on almost everything, but what can I say, they are fabulous.... I linked to the whole plate also because if you are like me you will need them all!!! 1455 is one of my all time fav. plates!)

Detail Pictures:


Thank you for looking! I hope you feel inspired to create also!!


Wednesday, June 14, 2017

If friends were flowers, I'd pick you!

Hello Again Everyone!

Today I want to share a card that I created for the Stampotique Originals Designers Challenge"Flowers" 


For this month we've teamed up with Eileen Hull to create something extra fun for you.
Today I want to show you the gift card basket I created.
(gift card not shown as I want it to be somewhat of a surprise to the recipient... but it will be slide down in the back)

Stamps Used:
Jillian
Smile
Mervynboy
Miguel has a gift
Newton
Texture Cube 1
Schmurfy
Spiral Daydream


Here you can see the pieces all die-cut 
(Super easy to put together!)


These are all of my base pieces inked... Now I forgot to take pictures of the next few steps
(you know how it is when you get into a project you are having fun with...)

Next I used a stencil for some added depth, and used texture cube 1 to add even more!
(love that cube! It's the one I used for most of the flowers also!!)

The flowers were inked and stamped with distress inks. I love how vibrant everything looks!
This is going to be a gift for someone special... and I want to add a gift card (or 2) behind the flowers in the basket...


Thank you for visiting my blog!
I hope you decide to play along with us for the challenge!!


Thursday, June 1, 2017

Stampotique June Stamp Release

Hello Again Everyone!! 

Today is a bit bitter sweet for me, I am so excited to share some inspiration projects using this months new stamp release from Stampotique Originals. 


This is also my last month to share with Stampotique, so I hope you all enjoy these pieces! 
(I will of course try out again when the next try out comes around)

I am looking forward to seeing all of the new inspiration to get me out of my creative funk.
I'm hoping to get my craft space reorganized in my time off... 
anyone want to help me organized? haha 

Ok, Ok time for what you all came to see.... These stamps are all awesome! 
(Stamp links posted below each image)


(this one is an art Journal tip in page)


Last but not least I wanted to share a card I recently made with my tea cup stamp...
(No, this is not a new stamp... But I love how the card came out so you get to see it anyway!)

Thank you for visiting!
Let me know what you think.
Do you have a favorite of the new stamps?


Wednesday, May 24, 2017

Oldie but Goodie

Hello Again Everyone!

Today I want to share a Tag that I created for the

 Stampotique Originals Designers Challenge

"Oldie But Goodie"


Stamps Used:


To create the background of this tag I used a variety of distress oxide inks along with one of my layering stencils.  (I love how it came out!)

The forground was  created in a few steps.... First, I stamped Connie direct to the tag (so any areas I miss when doing my fussy cutting will show up)

Second, I stamped her on cardstock and I stamped her arm I wanted to hold the bear an additional time. I also stamped the Teddy on cardstock. I colored all of these pieces then cut them out.

I glued down my main image of Connie, then I stamped the Teddy directly over the bear directly over this (Don't worry about the ear showing up on the hand... thats What the bonus arm was for... lol)

Now you can glue down your Teddy, and the arm. 

To finish the piece off I used a black micron pen to draw some shadows at her feet and a squiggly border around the edge. 

Thank You for stopping by my blog! 
I hope you join the challenge too!! 

Friday, May 19, 2017

All part of the plan...

Hello Again!

Today I want to share a fun, and sort of inspirational tag I created...


To Start I began with 2 of my new distress oxide inks (Broken China and Faded Jeans), as well and my original distress ink in Walnut stain. I layered the 2 blues on the tag and flicked a few water droplets to create the drop effect.


 (After I edged the tag in the walnut stain and added a few more flicks of water)
I also used some punchinella waste as a stencil for some light detail


Using StaZon black ink I stamped my gas mask guy (Man in gas mask).
To add detail I used a bit of corrugated cardboard, and some gear die cuts that I had "rusted" using Prima rust effect paste. (I blame Corrie for my purchasing this amazing stuff). 


Finally I added a Tim Holtz small talk quote layered on black. 


I hove how this piece came out, I hope you do also! 


Thank you for stopping by the blog today <3 


Wednesday, May 3, 2017

Single layer

Hello Again Everyone!


Today I want to share an art journal tip in page that I created for the Stampotique Originals Designers Challenge
"Single Layer"


Stamp used:

(background created with distress oxide inks)