Free background from VintageMadeForYou

Monday, April 6, 2020

Easy Easter Mail Art

Hello Again!

I'm back with more cute
Easter Mail Art!


Stamps Used:


Ok, so this time I totally forgot to take some action shots. 

Start by stamping your group of bunnies, then mask them off.  Next, stamp your cross with lilies. 

You can see here I have done that then began to color my cross and flowers. 
(you can remove the mask to color, but i chose not to for some reason)

Now remove the bunny mask so that you can color them too! 
(I chose browns , because i think of "chocolate bunnies")


So, after everything was colored I re-masked my bunnies then added a layer of yellow ink over the background.  When I was satisfied with that, I used layering stencils with pink and yellow to add more details. 


Wednesday, April 1, 2020

No Fooling, New release time!

Hello Again Crafty Friends!


Happy April 1st! 
I hope you are all safe and well during these crazy time!
I am staying safe and crafty here in Ohio. 

Ok, Are you guys as excited as I am about new releases?
This month has so many awesome samples! You will definitely want to stop by the Stampotique Originals facebook page! The team has really been blowing me away with these samples. 

Check out all the new stamps HERE.

Let's start with two super sweet stamps from Kassa. 
(I love how this card and envelope came out...I think these 2 are heading to my niece).


Next I will share my samples with Daniel's 3 awesome new releases!!! 
Yes, 3!

Ok, let's start with an art journal page using the new Gristen.
I love how this came out... She is so fun!
(I added the wings to her)


Now, time for a fun and simple birthday card using the new cake "Oncewholenomore".
I love the name of this one. lol


Ok, now my absolute favorite of this release ... Falstaff ... he is SO CUTE!
(These are all mail art envelopes of course)


Ok, What did you all think??? 
Love right!?!

Ok, well, back to crafty play and cleaning for me. 
Stay safe and crafty!


Monday, March 9, 2020

Hoppy Mail Art Monday

Hello again crafty friends!


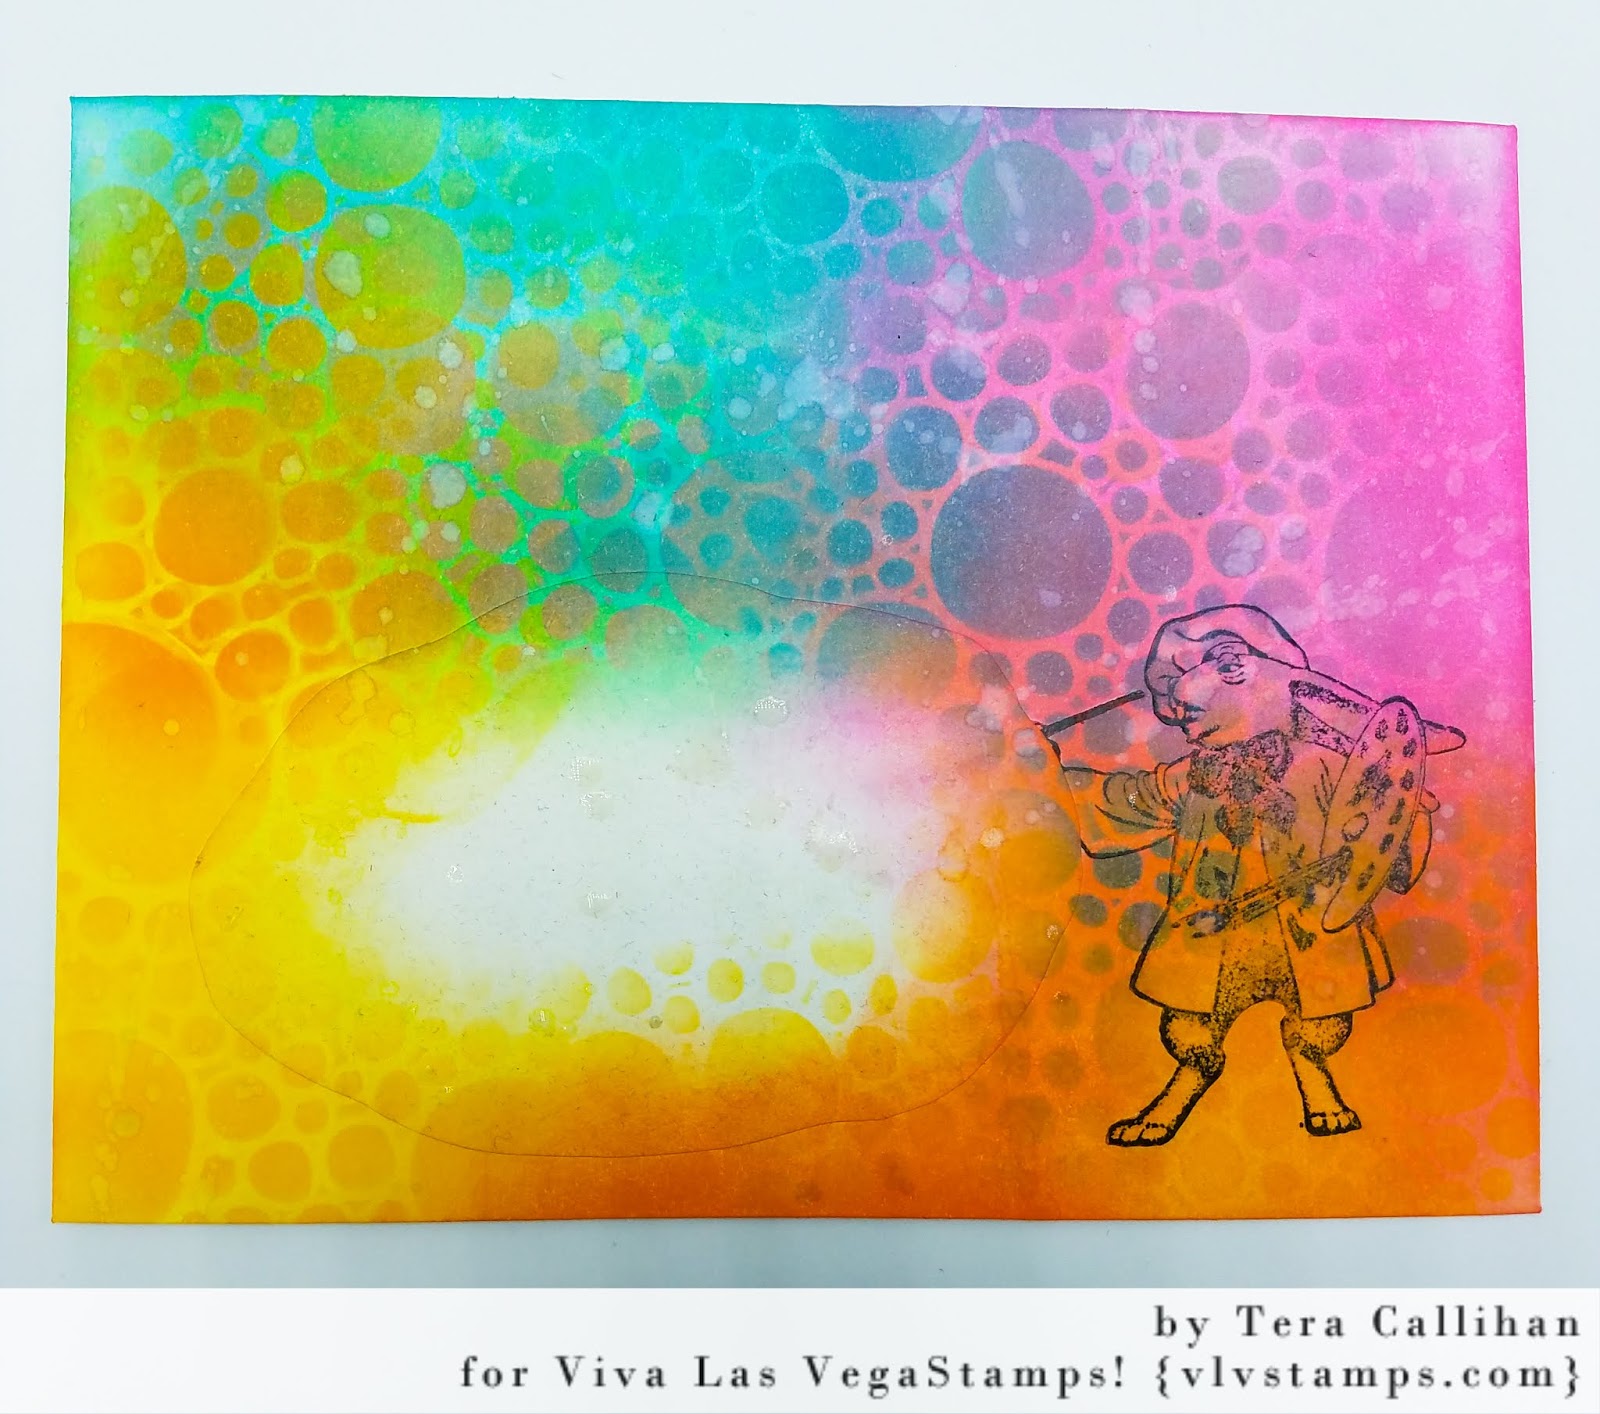
It's me Tera again. Today I am going to share a super fun and easy Easter envelope with you!

Stamps Used:


Are you ready for some colorful "Hoppy" mail?

Well, let's hop to it then...

 Beginning with an A2 envelope, I stamped the bunny in black memento ink, then masked him off.  Next I cut a blob shap out of scrap paper to make the mask for the address box. 

(below is the envelope with both masks in place)

Using Distress Oxide inks (picked raspberry, cracked pistachio, mustard seed, and ripe persimmon), I inked my main background layer


Next, using the same colors through a layering stencil I added a new layer of ink for depth.  I also added a few flicks of water for distressing. 


Now for the magic....
I removed the masks to begin coloring.
(I love the reveal!)


Finally I used various markers to color the bunny and add details.
(I love matching postage so I have added one on the envelope so you can see the full effect. I may use a different stamp to mail yet, we will see...)


I hope this artistic bunny has your creative juices flowing too now!
Hoppy crafting!


Thursday, March 5, 2020

Life Simplified

Hello Again!

Today, I'm here with more vintage inspired goodness using a super cute stamp from Viva Las VegaStamps!


Stamp Used:


Above you can see all my base layers:
(1 A2 cardm a second layer of distressed black card 1/8 in smaller than base. Tim Holtz sticky back burlap (from his Textured surfaces pack) cut 1/8 in smaller than the black distressed layer.
A piece of corrugated cardboard I had laying around, ripped to add interest and cut to card width.
Stamped image colored and stitched onto black kraftstock 1/8 in larger than the 2.5 x 3.5 in image. 


I used various distress inks to watercolor this image. 
Antique linen, vintage photo, and frayed burlap were used for the general distressing.


Here is a close up of the finished piece with some Tim Holtz hardware heads, metal stars, and a  snipit sticker.


I hope this card sparks your creativity and makes you want to get grungy and inky!


Thursday, February 27, 2020

Hippo Racing

Hello Again Crafty Friends!

Tera here again, and today I'm going back to my vintage and grungy roots!

(Also Hippo Racing, Why not!?!)


Stamps Used: 


Start with an A2 card base.
 Cut black kraft stock to- 5 3/8in x 4 1/8 inches, a piece in 2in x 4 1/8 in, and  3 7/8in x 2 5/8in. 
The scrapbook paper layers measure- 5 1/8in x 3 7/8in, and 4 1/8 x 1 3/4in
The stamped image layer is 2.5 in x 3.5 in. 

I distressed Everything with frayed burlap and antique linen distress ink. 

When my stamped image was colored (using Zig clean color markers), I stitched around the edges. (I meant to stitch the top and bottom of the skinny piece but glued it down too soon, so I hand drew faux stitching on it. )

Finally when everything was glued down, I stamped my quote using my stamping tool. 
(Tim Holtz stamp press)

 To finish everything off, I used various rub-ons from Tim Holtz and 7 gypsies for added details. 


What do you think? 

Do you want to try hippo racing?


Wednesday, February 19, 2020

Something Supernatural...

Hello Crafty Friends!!!

Today is a super fun one for me. I am a HUGE Supernatural fan!

Before you ask I can not pick between Sam and Dean, they are both yummy in their own way! But Sam's car..... OK so probably Sam if he comes with the car. 

(I've always loved a men with sexy black cars... aka Batman, Sam, I'm sure there's more)

Ok, Back to business, This card was made using Stamps from Viva Las VegaStamps!

Stamps Used:
(you are going to want them all so just get the plate it will be cheaper)
(all but the last 2 are on that plate of rubber!!)

I just love how this card came Together!

This one is gong to live with one of may patients, She is also a huge Supernatural fan, so I am going to surprise her at her next visit.

Want to recreate it?
Start with an A2 card Base, and some scrapbook paper.
 This piece is from a park lane paper pad ( Maps, Text & Ledgers)
I distressed the edges using hickory smoke and antique linen Distress ink and oxides. 
Then, I stitched around the outer boarder for added texture. 

Next, I created 3 tags for layering. I used inks in : Tuxedo Black Archival, Shadow Grey Archival, and Watering can Archival. 

I again distressed each piece with antique linen ans hickory smoke distress ink. 


Here you can see them all layered and glued. 


Ten for the final piece I glued the tags and Demon Hunter strip down using distress collage medium. 
For the car, I used pop dots to give added depth and interest. 

I hope you enjoy this too!

So, who wold you choose? 
Sam or Dean... or someone else?


Wednesday, February 12, 2020

Pure Heart

Hello Crafty Friends! 

Today I want to share something fun that I was inspired to make for the
Funkie Junkie Boutique Challenge. 


The theme is "Love is all around us"
You can join or read more HERE


I wanted to create something non-traditional and vintage. 
I knew right away that I wanted to used this heart ad by Tim Holtz.
(It's from the stamps set- ECLECTIC ADVERTS - CMS372)


I stamped it in black memento ink, and colored it with a red alcohol ink marker.


I distressed the focal image with distress ink in gathered twigs, and ground espresso. 


Here you can see the mica glued on the main image using distress collage medium. I also punched the 4 corners and added Tim Holtz hex fasteners.

For the base layer I used Tim Holtz correspondence paper pad. Which I also distressed using the same 2 distress inks. I also added some cord I had on hand. 

I also used layers of Tim Holtz kraft-stock for the bases.

Here it is all finished!
I hope you all enjoy it!

All you need is Love

Hello Crafty Friends!

It's Wednesday, and that means a new challenge over on the
Stampotique Originals Challenge Blog. 

The theme is "All you need is Love".

Stamps Used: 


I hope you all enjoy this card as much as I do! 

Happy Valentine's Day to you all!


Thursday, January 30, 2020

Simply Masculine

Hello Crafty Friends!

Today I am here again to share with you a super simple masculine card using a stamp from Viva lasVegaStamps!

(you know you always need those!)


Stamp Used:

Other Supplies:
Hickory Smoke distress stain spray
black soot and frayed burlap distress ink
Park Lane papers
Tim Holtz stitched rectangle dies
Memento ink- Tuxedo Black
 Tim Holtz "snippets" pack
Voltage Die (by Tim Holtz)


I wanted to create a slightly grungy yet simple card that would be good for any occasion.  I started by picking a background paper that was simple with a light colored pattern.  (The papers I used came from the park lane packs called - Maps, text & ledgers, as well Neutrals)

I began by cutting my focal paper out with a Tim Holtz stitched rectangle die. I then stamped my Fabrique stamp in black Memento ink. To add a grungy effect I used black soot and frayed burlap distress ink lightly around the edges and a few flicks of Hickory Smoke distress stain spray. 


Next, I cut the next to layers of mats for my card. I sanded the edges of the textured card-stock for some extra texture and grunge. I also used black soot distress ink on both of these additional mats to lightly distress them.  Finally, I used the edge of my scissors to rough up the bottom mat layer. 
(the bottom layer is bigger than the biggest die, so I was unable to die cut it with the stitching. It is 4in x 5.25in)


To finish, I matted my card on a black A2 card base, and added my finishing touches.  The rusty bolts I created with my Tim Holtz voltage die, and the tiny ephemera is from the Tim Holtz "snippets" pack. 


(Just a note for the bolts- I used distess oxide sprays to color them as well as distress crayons)

I hope you enjoy this fun and easy card! 
Stay crafty!